7 Mistakes to Avoid While Buying a Home Insurance Policy

You need reliable insurance coverage to safeguard your home if you own one. A home insurance policy aims to rebuild your home and replace your possessions in case of a significant loss. Whether acquiring a policy for a new home, renewing an existing one, or making a first-time purchase, it is crucial to consider your decision seriously. However, choosing a house insurance coverage can be challenging. There are many insurance companies and policies and endless details to consider. Before it’s time to make insurance claims, many homeowners are unaware of their home insurance specifics. When purchasing home insurance coverage, avoid making these seven expensive mistakes. 1. Underinsuring Your Home According to insurance experts, one of the biggest mistakes people make is failing to buy adequate insurance that will cover the expense of rebuilding their homes in the event of destruction. With the right insurance, paying a modest monthly premium is brilliant. But if you forgo coverage for a cheaper rate, you may pay for it later. Some homeowners buy the bare minimum of insurance, just enough to meet their mortgage needs. Such a move is a costly mistake should you ever file a claim. The expense of underinsurance may be far greater than your monthly premium savings. Some policyholders also insure an amount equal to their home’s market value. However, this amount might be significantly lower than the actual cost of reconstructing your home, including labor and supplies, which could increase considerably in the aftermath of a hurricane due to high demand and limited supply. Calculate the cost of rebuilding your home to avoid making this error. Check to see whether your coverage comes close to that sum. If it’s not, step up your premiums. Remember to factor in the price you’d incur to replace the unique elements of your home, like marble floors, when evaluating the cost of rebuilding. Further, ensure you have enough insurance to cover your valuables, such as jewelry, artwork, and antiques. 2. Assuming You Have One Flat Deductible A deductible is a payout you need to make before your insurance policy starts covering claims. Some policies contain percentage deductibles for specific perils, even though your insurance may have a flat rate deductible. Depending on what you indicated when purchasing the coverage, you might think your maximum out-of-pocket expense would be $600, $1,000, or something else. Wrong. The deductible is often a percentage of your policy in cases of named perils such as storms or other significant weather occurrences, such as earthquakes and windstorms. In the event of a flood, it may amount to 1 to 5% of your insured value, whereas in an earthquake, it could amount to 10 to 15% of the coverage. Therefore, if your home has coverage for $200,000 and you suffer flood-related damages, your claim could result in a $10,000 deductible. Consult your insurance agent regarding options with one flat rate deductible before picking a home insurance policy. However, this can be more expensive and difficult to find. 3. Not Including Flood Insurance Coverage When hurricanes, tropical storms, or torrential rains strike, flood insurance protects your home and possessions from floods and storm surges. Most homeowners’ insurance policies, however, exclude flood coverage. Unfortunately, many people are unaware of this fact. You can get flood insurance from the National Flood Insurance Program. Talk to your agent about every detail of the policy so you know the coverage provided and the other policies you can purchase to maximize your protection. Adding flood insurance to your home insurance policy would be worthwhile if you reside in a flood-prone area or low-lying terrain. Even a small amount of water can result in damage costing several thousand dollars. Additionally, homeowners may erroneously believe their policy covers; Earthquake Sewage backup Mold 4. Not Understanding Your Insurance Terms [https://pixabay.com/photos/mortgage-house-contract-sign-home-5266520/] Knowing the distinction between replacement costs and actual cash value could save you money if you ever need to file an insurance claim. When you file a claim, actual cash value pays out the value of your possessions at the time of the claim. This implies that reimbursement won’t cover the expense of replacing such items or the price you paid. If you select a coverage that pays replacement costs, you will have the money to replace lost items. Additionally, insurance firms have long since abandoned “all risk” policies, which were costly for residents of states with significant exposure. Although it does not act as a warranty plan, your homeowner’s insurance safeguards you in the case of a calamity. Spend some time learning and understanding the contents of your cover. 5. Failing to Bundle Your Policies One of the mistakes you can make when purchasing home insurance is not taking advantage of bundling policies. Your insurance agent can help you buy various insurance plans in one location. These may include your motor vehicle insurance plan, coverage for your most precious possessions, and home insurance. Your insurance provider may offer substantial discounts whenever you bundle multiple plans. You can also tailor your coverage to suit your lifestyle by adding other policies to your standard house insurance policy. By bundling your plans into a single multipolicy, you may save a significant amount of money on insurance over time. You may save up to 25% on your overall costs when purchasing many policies simultaneously. Over time, you will also save a ton of time because having your insurer handle all your needs in one place eliminates the need for many phone calls, discussions, and general back-and-forth with different insurance companies. 6. Settling for The Wrong Insurance Company Home insurance aims to provide protection should you lose your house. You may end up with the coverage you don’t need if you pick an insurance provider based solely on price or proximity to you. Before making a decision, do your homework on local insurance providers, meet with your agent, and ensure you fully understand the terms of your policy. You need to be sure that the insurance company you’re dealing with is reputable and has a
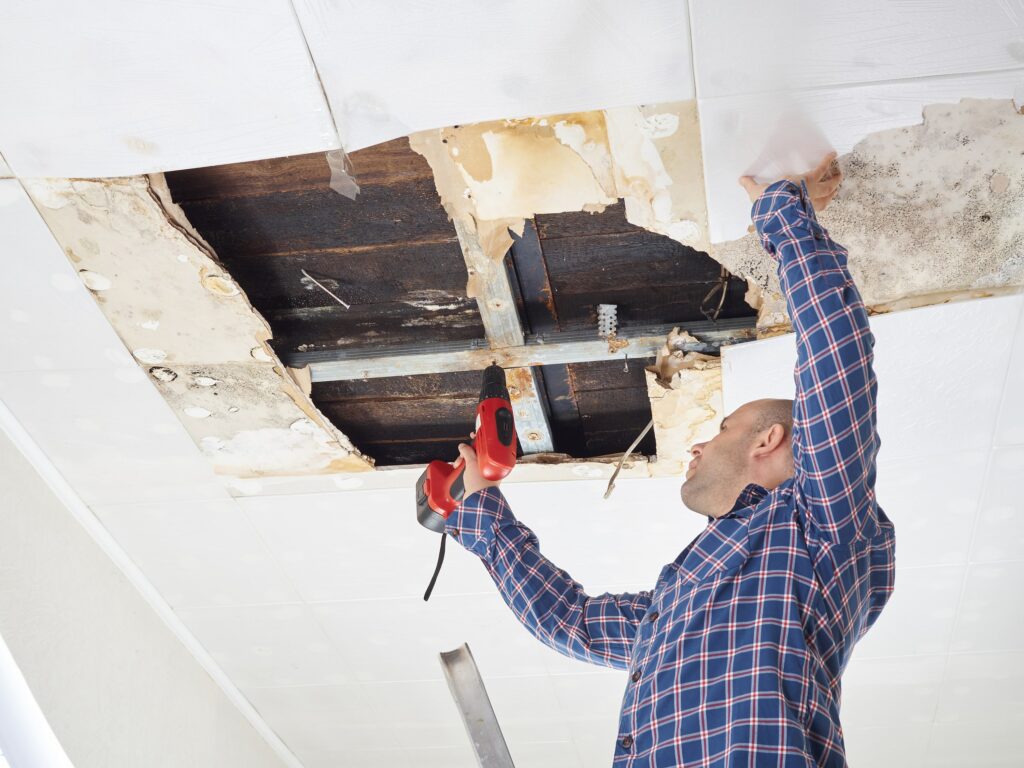
How to Identify Asbestos in Your Home
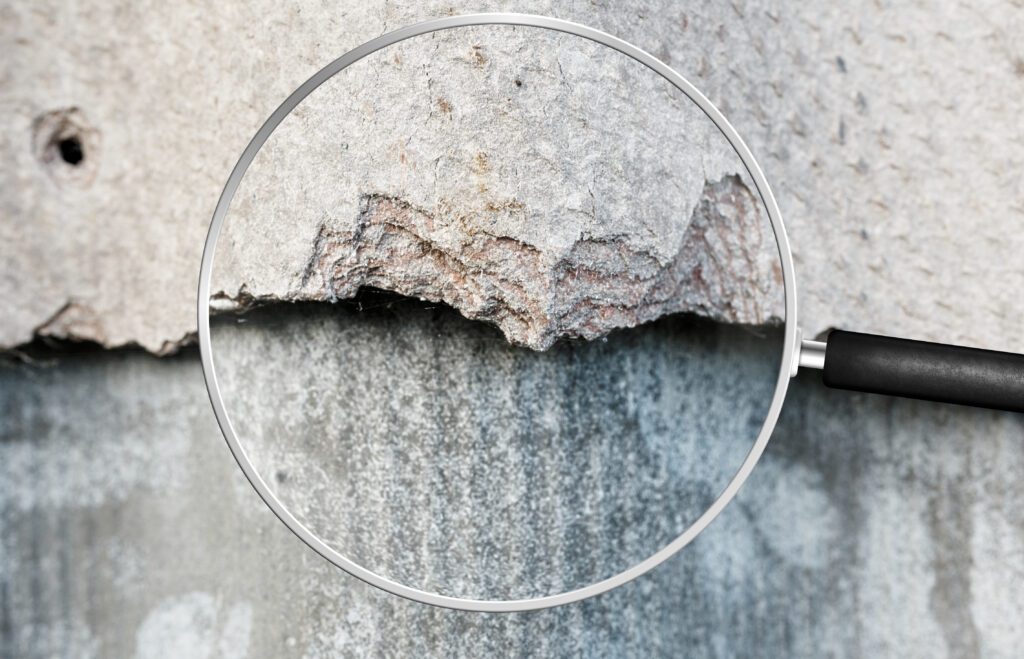
Asbestos is a mineral found naturally in certain types of rock worldwide. From the beginning of the 1940s to the 1970s, asbestos was widely used in manufacturing products, particularly building materials. This was because of its; Fire resistance Durability Reasonably low price Sadly, it was later discovered that exposure to asbestos fibers presents severe risks to respiratory health. Exposure to asbestos fibers can also lead to other health complications; asbestos Lung cancer Non-cancerous lung disease There is no cure for these illnesses, which all result in death. Places You Can Find Asbestos in Your Home? The United States outlawed spray-on asbestos and several other uses in the late 1970s, which significantly reduced the use of asbestos. However, asbestos is still present in some older houses. In such homes, asbestos may be present in various construction materials like paint, floor tiles, and insulation. Furthermore, before the 1980s, many American homes and public buildings, including schools and government housing, contained asbestos in the following materials: Some vinyl floor tiles Asbestos insulation around steam lines Cement asbestos board siding/under sheeting Asbestos roofing felt for shingles textured paintestos-containing vermiculite insulation Vinyl floor tiles Although many residential applications for asbestos are no longer allowed, it is still permitted in the US for over a handful of other applications. Signs Your Home Might Have Asbestos It is difficult to detect asbestos, which can often hide in plain view inside your house. Asbestos can appear as green, brown, or blue fluffy fibers. However, tiny fragments can also be present in materials such as cement or plastic, making them difficult to identify by yourself. Asbestos is hazardous when disturbed, so you should never dig around to look for it. While you can gather samples for testing, it is much better if an asbestos expert handles the task. Here are a few signs your house might contain asbestos: It has been around since the early 1980s Has corrugated roofing It has an older cement water tank It contains vinyl flooring or millboard included between 1952 and 1982 Has vermiculite insulation Have walls or other interior surfaces made of cement sheets Everyday Asbestos Exposure at Home The following are some of the common ways Asbestos exposure can occur at home ways: DIY home improvements, such as attic remodeling Replacing a worn-out pipeline. Drilling holes through drywall Vinyl floor tile removal Cutting Insulation on Pipes Removal of popcorn ceiling When to Carry Out Asbestos Testing for Your Home [https://pixabay.com/photos/sign-caution-asbestos-spray-paint-3789310/] In the 20th century, constructors mainly used asbestos in building materials and home insulation, and it’s easy to see why. Asbestos is durable and can resist heat, corrosion, and electricity. However, over the years, studies have found asbestos to be highly toxic, which has led to its ban. Statistics show that asbestos-related diseases causes 255,000 deaths annually. These illnesses include: Stomach tumors Asbestosis Stroke Pleural plaques Most homeowners might never need to have their houses tested for asbestos. Simply having asbestos in your house is not dangerous, as asbestos fibers are only a health hazard when inhaled. However, you should hire an expert to conduct an asbestos test if you; Intend to do construction work Observe damage to some of the drywall, siding, or piping Plan to remodel Have other concerns. How Asbestos Testing Works The length of the inspection procedure will depend on how big your house is. It may take hours or some days. The asbestos expert will do the following while inspecting your home; Turn off the heating and cooling systems to avoid the dispersal of any particles. Cover the surface beneath the test area with a solution of water and soap to minimize the discharge of fibers. Take tiny bits of potentially hazardous material. The aim is to disturb it as least as possible. Place the contaminated material into a secured container for shipping Clean the inspection area and throw away any remaining materials Gather any loose materials or fibers, not in the covered area with a wet cloth Submit the sample material to an accredited laboratory for testing. What to Do If Your Home Has Asbestos Following the discovery of asbestos in your home, your next course of action will depend on the following; The type of asbestos Its location Whether friable or not Friable asbestos could readily disintegrate, releasing hazardous airborne particles. However, some materials containing asbestos are non-friable and are still secure if they’re in excellent shape. Your contracted asbestos expert may then decide to remove the asbestos or repair the affected areas with an encapsulant or covering, depending on the state of the asbestos. You will need to leave the house until an air test shows clear of all residue should the expert find it necessary to remove the asbestos. Asbestos removal is typically more expensive than a repair, but if you first repair, asbestos removal may be more challenging and costly in the future. 1. Enscapulation (sealing) Encapsulation is the application of a sealant to the material, which either coats the asbestos material or bonds the asbestos fibers to prevent fiber release. This method is efficient for furnace, pipe, and boiler insulation. 2. Covering(enclosure) Covering entails wrapping a jacket or protective wrap around the asbestos-containing substance to prevent fiber release. Never try to remove asbestos yourself from your house, as improper asbestos handling may create additional problems. You should always engage a specialist. Asbestos removal may seem expensive, but it is worth it. The average cost of asbestos removal ranges from $1,100 to $2,800. Guidelines for A Safe Asbestos Removal Obtain written confirmation from the contractor that they complied with all applicable asbestos removal and disposal laws Ensure to engage only contractors granted state authorization to do asbestos abatement work. Request references and recently completed comparable projects. Request a disposal manifest before settling the final invoice to confirm that the contractor will dispose of the material in a landfill authorized to accept asbestos. Find out if the company has ever had safety violations. Contact the local air pollution control board, the organization in charge of worker safety, and the Better Business Bureau. Confirm the contractor
How to Repair and Prevent Bathroom Water Damage
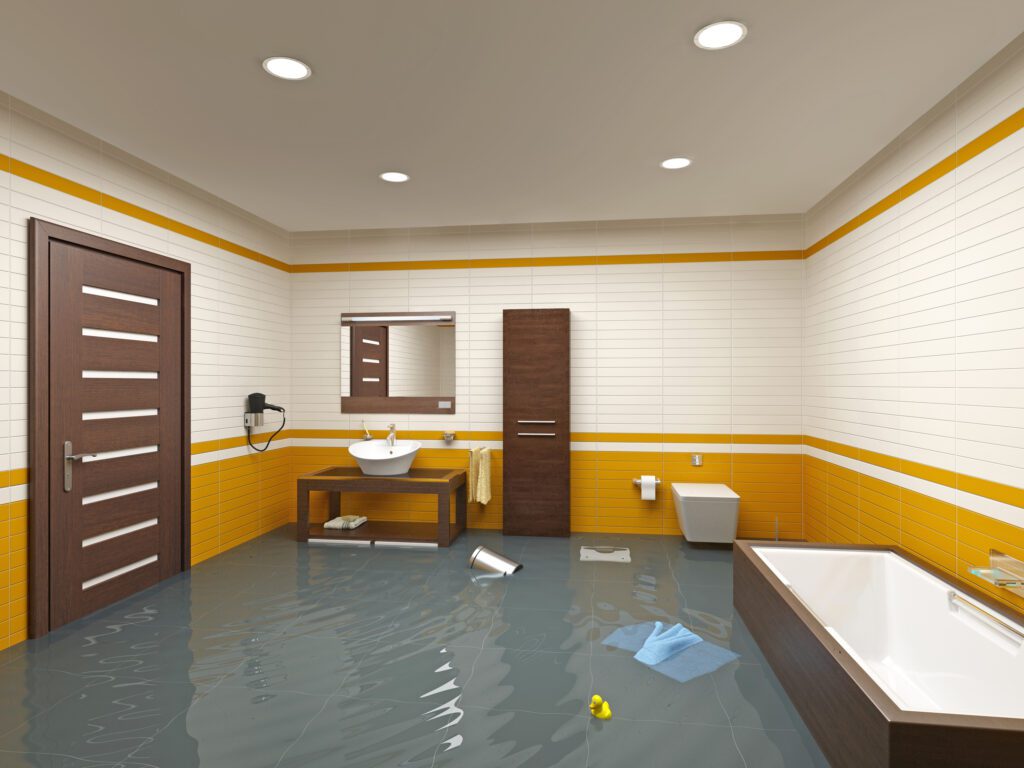
There’s no doubt that water is the key to life, but this theory doesn’t apply to the inside of your home. The damage can quickly disrupt your life, making your home a health hazard. Water damage is unique as it builds up and worsens over time, eventually distorting frames and floors, cracking tiles and sealant, and softening ceilings and walls as mold thrives. Excess water seeps into tiny cracks and pores, so even small amounts can cause irreversible structural damage with time. Such damages are widespread in bathrooms where water and moisture are perpetually present. We often overlook the process until significant damage, like cracks and bulges, catches our attention. If you face water damage in your bathroom, this article demystifies how to repair and prevent recurring damage. Recognizing Water Damage in Your Bathroom The absence of obvious evidence of water damage doesn’t mean it’s not present. Some warning signs can hint at underlying issues since the damage lurks under floors and behind walls. If you notice one or more of these signs, there’s a high chance your bathroom has water damage: § Soft or Spongy Floor One of the earliest signs of water damage in your bathroom is a soft spongy feel when you step on the floor. Most subfloors consist of a plywood subfloor which is highly water-absorbent. The plywood absorbs water, which causes the wood to soften and swell. This damage is most common on the floor near toilets and bathtubs. § Moldy or Musty Smell A moldy or musty smell in your bathroom can indicate water damage. Inspect your bathroom to identify the source if you notice such a smell. § Stubborn Mold or Fungi If mold keeps re-growing after cleaning it, you may have some underlying water damage. § Damaged Paint, Drywall, or Tile Issues Water can move a long distance through the subfloor or walls, so the leak may be further than where the visible damage appears. Look for blisters and damaged or peeling paint on your walls. Moisture seeping behind your walls can also cause the drywall to bubble or warp and tiles to loosen. How To Repair A Water-Damaged Bathroom If you notice any signs of water damage, it’s best to address the issue quickly. Procrastinating could cause irreversible damage and make your home a health hazard for your loved ones. 1. Thorough Mold Inspection The first step when dealing with water damage in your bathroom is conducting a comprehensive mold inspection. You can identify mold in your subfloor or drywall by stains on surfaces and walls and a musty smell. If you think the signs of water damage on your floor or walls are due to a more extensive mold infestation, the best move is to work with qualified water damage experts like NYTDR. These experts have the proper knowledge, skills, experience, gear, and tools to conduct thorough inspections safely. They will handle the damaged items and repair the damage, leaving your bathroom in a better state than before. 2. Room Preparation Once the experts remove the mold, you can prepare materials for the repairs and renovation. You can start by shutting off the main water valve to avoid causing further damage during the repair process. If you have furniture like a vanity and portable items, it’s best to remove them from the water-damaged bathroom. Working with industry experts with experience in bathroom restoration is a great way to save on restoration costs for damaged items like your bathroom vanity. 3. Fixing the Drywall If the water damage has affected your bathroom’s structural integrity, ensure you contact certified contractors to help with the renovation. You can DIY the repair using a keyhole saw and hammer for minor damages. You can cut the affected areas in a rectangular or circular shape to simplify the patching process. You’ll need some clips to hold up the new pieces as you secure them with joint compound and tape. Once the patches dry, you can sand and paint them to match the surrounding drywall. 4. Repairing the Floor Once the drywall repairs are complete, the next step is clearing the debris to prepare the bathroom floor. Rather than removing the damaged tiles, vinyl, or flooring and exposing protruding screws, nails, and baseboards, let experienced professionals handle this next step. The team will handle the removal and replacement of any type of flooring. 5. Installing the Fixtures With your floor and walls all done, it’s time to install new fixtures like toilets, cabinetry, sinks, shower heads, and any other items you need. If you fancy new lighting or smart devices, this is your chance to build your dream bathroom. How to Prevent Water Damage in Your Bathroom Although it can be challenging to keep your bathroom dry, you can prevent further or future water damage by: § Repairing or Replacing Missing, Cracked, or Broken Tiles Water can quickly seep through damaged tiles on your walls and floors, causing water damage. Your bathroom restoration should include replacing such tiles to avoid undoing the repair work. § Regularly Inspecting the Floor for Excess Water. It’s essential to keep checking the bathroom floor to ensure all the water drains away after using the shower or bathtub. Placing a bathmat on the floor can help absorb the excess water. § Regularly Checking for Signs of Leakage It’s best to schedule regular inspections to check for signs of leaks like moldy walls or ceilings, discoloration, and paint bubbling. You can feel the walls for soft spots and walk barefoot across your floor. Remember to check areas under sinks and vanities where water could pool. § Inspecting the Grout and Sealant Sealants and grout ensure that bathroom fittings like tiles, bathtubs, and shower cubicles remain in place. Regular exposure to heat and moisture can cause wearing and cracking, which allows water to seep through. You can clean the area and remove the damaged grout if you notice extensive damage. Allow the area to dry well before installing a new layer to prevent
What You Need to Know About the Changes to Home Insurance in 2023

Although not a legal obligation, if you have a mortgage, your lender will insist that you carry home insurance to safeguard its investment. Home insurance is always a good investment, even if you do not have a mortgage. A homeowners policy provides a financial cushion by providing liability and property coverage, which you may later appreciate. Your insurer will inform you of the adjustments to your policy or prices for the upcoming year about a month before your home insurance renewal. Most years, these revisions are nonexistent or so small that homeowners don’t even notice them. But in 2022, homeowners’ insurance costs increased significantly across the nation. An assessment of home policy renewals between May 2021 and May 2022 revealed that the average increase in house insurance rates was 12.1%. There was an average rise of $134 for homeowners whose rates soared. Since house insurance continues to be on the list of products with rising prices in 2023, the increase in policy rates is still here with us. Reasons Why Home Insurance Rates Continue to Increase In 2023, we will project an increase in home insurance rates for the following reasons. 1. A Continued Rise in Inflation Inflation hurts the costs of all consumer goods and services, and the insurance industry is no exception. During inflationary periods, the cost of items that impact claims and premiums increases, raising insurance costs. The amount you pay in premiums depends on the cost of dwelling coverage in your policy. This portion of your homeowners’ insurance covers rebuilding your house in the case of damage or destruction. Homes now require more significant dwelling coverage limits due to escalating prices caused by inflation. In addition, the COVID-19 pandemic caused disruptions in the supply chain. The geopolitical unrest in Russia and Ukraine also caused a 17.7% increase in building material prices over the years. A severe labor shortage is also present in the construction sector. By November 2022, there were more than twice as many construction job opportunities as the U.S. Bureau of Labor Statistics anticipated. In the years ahead, this number is only likely to grow. These factors lead to high home-rebuilding expenses and, as a result, soaring insurance rates for those properties needing replacement. 2. An Increase in Natural Disasters The most recent in a series of rising natural disasters is Hurricane Ian. Wildfires, cold snaps, frequent hail, and windstorms during the previous few years have all resulted in a rise in insurance claims. Most insurance companies are raising their premium rates to cover these costs and prevent going bankrupt. The National Oceanic and Atmospheric Administration provided that in 2022, 18 severe natural disasters caused losses worth over $165 billion, an increase of 6% from 2021. The state of Florida alone suffered $116.7 billion in losses due to Hurricane Ian, which devastated it in September 2022. Construction and labor rates are generally steeper in states affected by natural disasters, and this is due to increased demand and shortened supply. Such states include Texas, Florida, and California, and they are at high risk of tornado, hurricane, and wildfire destruction, respectively. So, if you live in any of these high-risk regions, prepare for an increase in your insurance costs. Price inflation and increased reconstruction charges are likely to affect you. 3. Your Home Is Due for Upgrades At the renewal of your policy, your insurer will carry out an inspection. Should you need new electrical work, roof, or other upgrades, your premiums may increase to reflect the high risk of claims. Roof replacement is usually expensive. The following factors about your roof will impact your insurance coverage and premiums: Age Location Condition 4. Age of The Roof How old your roof is, is one of the critical elements that affect your homeowner’s insurance rate. Roofs are expensive to replace or repair, hence affecting the cost of your homeowners’ insurance. A good roof can last anywhere from 20 to 100 years. Your insurance provider will inspect your roof yearly, regardless of the material or quality of artistry. As your roof ages, your insurance costs will increase, or your coverage will decrease. When a roof reaches the age of 10, you can expect slight changes in your policy, and more significant changes will come after it reaches the age of 20. Replacement and insurance costs for older roofs are typically higher. As your roof ages, it is more likely to sustain damage, increasing the cost to insurance companies when it needs rebuilding. Sometimes, insurers deny coverage, increase prices, or even discontinue your policy if your roof is years past its anticipated lifespan. The average cost of homeowner’s insurance by the age of roof in 2022 Roof’s age Average yearly expense ($) New roof 1,739 Ten years 1,859 15 years 1,898 20 years 1,913 National average rates are based on analyzing the insurance premiums for policyholders with varying roof ages, as given by Quadrant Information Services. 5. Your Home Location Living in high-risk places like Oklahoma with tornadoes and California with wildfires can impact insurance costs. Insurance firms in these states often demand that policyholders acquire extra coverage for disasters like floods, tornadoes, and hail damage. The increased premiums homeowners pay will cover replacing the roof when catastrophes occur. 6. The Condition of Your Roof Wear and tear is inevitable. However, keeping your roof in good shape is essential to preserving its integrity and maintaining reasonable premiums. A standard insurance policy hardly covers damage brought on by negligence and depreciation. You, therefore, need to make an effort to maintain your roof. Actions You Can Take to Reduce Risk Conduct routine maintenance and inspections. Determine the ideal age to replace your roof. To prevent unforeseen costs or coverage limitations, conduct thorough research before selecting a roofing material. So that you understand what to expect, carefully read your insurance coverage. 7. Your Insurance Rating Dropped Your insurance score indicates the probability that you will make a claim based on statistics. Insurers often use a combination of your credit
How to Check for Water Damage in Your Apartment
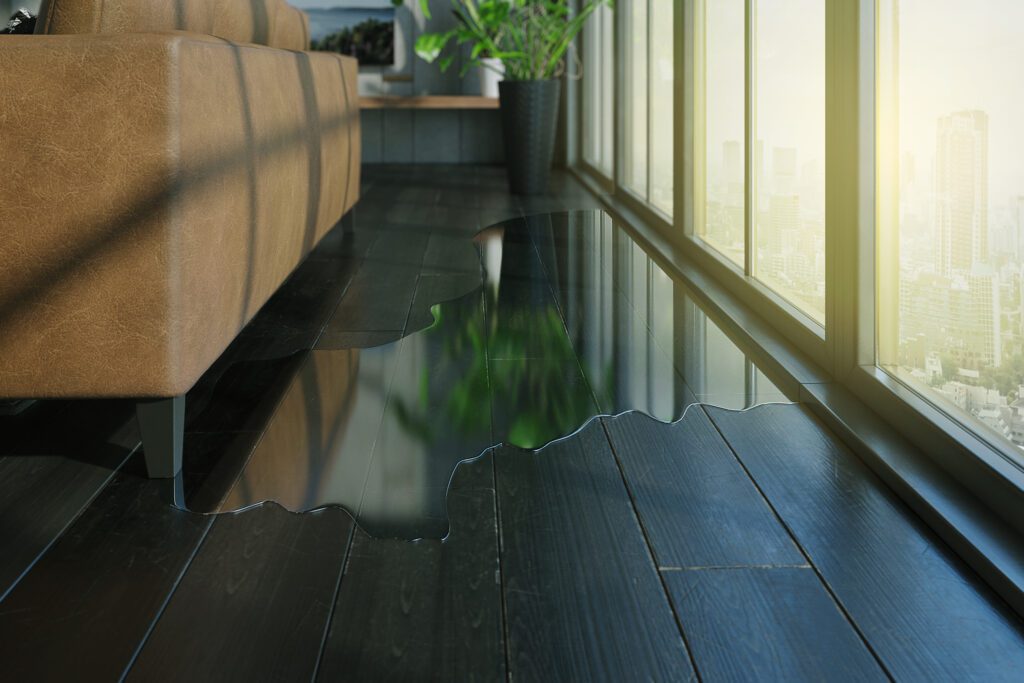
Are you wondering if there is water damage in your apartment? Water damage is a common problem that can cause major long-term issues. Knowing the signs and how to check and prevent it will help keep your home healthy and potentially save you money. Let’s explore the top causes of water damage, how to identify signs of water damage, and the steps to check water damage in your apartment- including hidden areas. Let’s get started! Common Causes of Water Damage in a Home Water damage in a home can be due to many different factors. For example, leaky pipes, leaky AC Unit, and overflowing sinks are the most common causes of water damage. Natural disasters and heavy rains can cause floods that lead to water damage. Problems such as faulty gutters or downspouts can also allow rainwater to enter your home. Such issues cause significant water damage over time. Finally, poor home maintenance can also cause severe water damage. For instance, failing to clean out gutters regularly or not checking for signs of leaking pipes can also lead to costly repairs due to water damage. It’s best to keep all these causes in mind when trying to prevent any potential long-term issues related to water damage in your home. Signs of Water Damage on Walls Water damage on walls can be hard to spot if you don’t know what you are looking for. One way to tell is by looking for discoloration or staining on the paint and wallpaper. Such signs may indicate that there has been a leak somewhere in your home. Bubbling or peeling paint strongly suggests leakage in the pipes beneath the walls. The leaking water seeps through the paint and wall, causing the bulge. You should also check for signs of mold growth, as this indicates that moisture in your walls could lead to further damage over time. If you notice any bulging or soft spots on the walls, it could also indicate water buildup behind them. For instance, you can press drywall in areas you suspect to see if it softened. If the area caves in, you likely have water damage inside the wall, even if the outside looks normal. Finally, keep an eye out for any cracking or warping due to moisture seeping from outside sources such as rainwater or flooding. These signs are severe and require immediate attention to prevent further damage. Ensure you seek professional assistance immediately from experienced remodeling contractors such as NYTDR. Such experts understand how important it is to identify potential water damage issues early. They’ll address them quickly and effectively with minimal disruption and cost. A team will visit your home for a comprehensive inspection. It includes checking for signs inside walls, floors, ceilings, and outside gutters and downspouts. They’ll check all areas where structural integrity can easily get compromised by hidden leaks over time. Compromised integrity can lead to costly repairs down the line. With expertise in local regulations, you can count on the experts to ensure your home remains safe and compliant with all applicable laws. Signs of Water Damage on Floors and Ceilings When it comes to water damage on floors and ceilings, the most common telltale sign is discoloration or staining. The discoloration could be due to a leaky pipe or a flooding issue that has gone unnoticed for some time. Another indication of water damage is the warping or buckling of the flooring. If you notice warping, it may be a sign of too much moisture in your home for an extended period that causes the wood to swell up. You also want to look for any visible mold growth, which could indicate a moisture problem. Finally, if you see any cracks in your ceiling or walls near the water pipes, this could indicate that something needs attention before further severe damage occurs. Other signs of water damage in your apartment include: § Damp Odor Some symptoms of water damage are not visual. One of the most noticeable non-visual signs is your home’s strong mildew or damp smell. Smelling mold in a room often indicates water damage within the walls. Although most older homes naturally have a slightly damp smell, it should be a subtle odor. If you notice a strong odor in any room, it’s best to have a professional conduct a thorough investigation. § Unusual Sounds Strange as it may sound, it’s possible to hear water leaks in your apartment. One of the simplest ways to check for signs of a leak is by listening. For instance, you can switch off all electronics in your home on a rainy day and stand in the room where you suspect a leak for a few minutes. When listening to the rain, it should sound like the water is sliding off the roof. Dripping water has a different sound than sliding water. Checking Water Damage in Your Home or Apartment If you live in an apartment, it’s crucial to stay aware of potential water damage. You can take several steps to check for signs of water damage and take action before the issue worsens. First, inspect any exposed pipes or fixtures for signs of leaking or dripping. If there is evidence of a leak, contact your landlord immediately so they can arrange repairs from qualified professionals. Also, inspect ceilings and walls near plumbing fixtures. Check for discoloration or staining, which could indicate a hidden leak that may not yet be visible. Finally, if you have carpets in your unit, ensure you periodically check underneath them for signs of dampness. It could indicate moisture seeping up from the floor below. Taking these simple steps will help ensure that you identify any potential problems with water damage in your apartment early on and to address them appropriately. If you’re a homeowner, you likely have a homeowners insurance policy. The home insurance policy should cover the costs of repairing the affected areas and replacing the damaged items in your home. Most renters also have a
Happy New Year 2023!

Welcome to the New Year! As we enter into 2023, we at NYTDR would like to take a moment to thank our beloved clients for entrusting us with your home restoration needs. We are proud of the work that has been done over the years and look forward to continuing our commitment to providing you with quality service throughout this new year. We understand how stressful home damage can be and strive each day to ensure that all of our clients receive efficient and effective solutions. Our team works hard every day towards making sure that your insurance claim is accurately assessed and taken care of as quickly as possible so you can go back to living worry-free in your restored home. We want to take this opportunity to thank you for entrusting us with all of your home repair needs. We understand how important it is for our clients that their homes are restored quickly and efficiently so they can get back into their daily routines as soon as possible. We strive each day to make sure that our services meet and exceed expectations, providing top-notch customer service along with quality workmanship every step of the way. Happy New Year from all of us at New York Total Damage Restoration!
What You Should Know Before A Kitchen Restoration

When it comes to water, fire, and smoke damage, the kitchen is the most vulnerable part of the home. Leaking plumbing, faulty appliances, or even cooking accidents can damage your kitchen. But you can restore a damaged kitchen to its former glory or create an entirely new space. Before you embark on a kitchen restoration, here are some essential things you should know. Top 5 Factors to Consider Before A Kitchen Restoration 1. Budget Damage restoration typically means a significant and unexpected expense for homeowners. But before you get overwhelmed by renovation costs, figure out the following: How much you can spend – what’s in the bank How much you wish you could pay – this is a great way to get creative with your kitchen choices What you absolutely must have in your restored kitchen How much of the restoration work can you do yourself versus hiring a contractor How much you can spare for hidden costs – you may discover mold, pests, or structural issues once the renovation is underway 2. Time Frame The general rule in home renovations is that it takes twice as long as you’d expect. Know how much time you can give to your kitchen restoration, including if it drags on for an extra week or two. Next, find a contractor who can do the project in half the time. This way, you’ll be well within your schedule if the contractor needs more time. 3. Insurance Your homeowner’s insurance can help manage the kitchen restoration costs, including repairing or replacing cabinets and appliances. You can also get reimbursed for extra living costs if you have to move out of your home for the damage restoration process. However, you must prove that the damage was due to something beyond your control, not the homeowner’s negligence, then settle for much less than you deserve. It’s better to have a damage restoration company like NYTDR handle insurance claims on your behalf. 4. Storage A kitchen restoration is a chance to rethink your cabinetry in terms of style and space. Suppose you want the same cabinet material or color as before. In that case, you can elevate the design by adding extra functions like a lazy Susan or updating the pulls and handles. Also, consider maximizing wall space and corners to add extra room for your utensils and gadgets. 5. Layout Think of your kitchen with all cabinets, drawers, and appliances open. If doors bump into each other or block access to any other kitchen feature, you have a layout problem. A kitchen restoration can help you reorganize your floor plan to increase functionality, especially if your family is growing or if it’s your forever home. Speak to your contractor about future-proofing your kitchen for pregnancy and old age. What To Expect From A Kitchen Renovation It’s essential to understand the kitchen renovation process, whether you’re handing it over to a professional contractor or doing some parts yourself. Once you know what it takes, you’ll better manage your expectations and stress levels. The typical damage restoration process follows the steps below: Step 1: Demolition The damaged cabinets, floors, walls, and fixtures must go out before the new elements come into your kitchen. Don’t be tempted to DIY this step, in any case. You may interfere with the wiring and plumbing or damage your home’s structural integrity. Leave the experts to tear out your damaged kitchen and remove the debris safely. Step 2: Plumbing and Framing You’ll need to move the plumbing and frame the walls to accommodate features like a kitchen island, new sinks, or new ventilation. There’s less work involved at this stage if you opt for a replacement rather than a complete kitchen renovation. Step 3: Inspection A professional inspection ensures that everything in the walls meets building codes before adding the drywall or other finishings. A licensed kitchen restoration crew handles the assessment and gets the approvals necessary to proceed with construction. Step 4: Complete the Walls Once you pass the building inspection, the next step is to install the drywall, windows, and doors. Consider the kitchen’s insulation, so seal every crack to minimize heat loss in cold weather. Also, install the trim for the cabinets at this stage for precise fitting. Step 5: Install Cabinets, Fixtures, Countertops, And Appliances At this stage, your kitchen restoration truly comes alive. You’ll start to see your restored kitchen as it once was or watch as all the elements of your brand-new space come together. Of course, there may be some plumbing or electrical challenges here, so trust your professional contractor to solve them as they arise. Also, if you’re upgrading appliances, go for features that add value to your home, such as energy efficiency and smart devices. A Note About Flooring Depending on various factors, you can install the flooring before or after your cabinets and appliances. For example, cabinets come before installing thinner flooring like vinyl or laminate and hardwood or tile flooring. A baseboard or molding covers the gaps between the flooring and the cabinets. In contrast, cabinets come after flooring if you need to correct the floor height because of construction flaws or if you need to reach standard countertops height. Weigh the pros and cons of each flooring option as you plan your kitchen renovation. Stress-Free Professional Kitchen Restoration With NYTDR No homeowner needs the pain of property damage, but these tips can help you think things through. Save yourself the stress by choosing a professional kitchen restoration company like NYTDR to handle damage restoration from start to finish. We sort out your insurance at no extra cost and design and build your new kitchen within your schedule and budget. Our designers and contractors walk you through every step of the damage restoration process. Share your dream kitchen with us, and we’ll make it happen. Call 212.206.1300 to start your free consultation today.
How to Find Out if You Have Been Exposed to Asbestos

Asbestos refers to six naturally occurring minerals that exist as bundles of fiber that can separate into thin threads. Asbestos fibers don’t conduct electricity and are resistant to fire, chemicals, and heat. These properties make asbestos appropriate for multiple industries such as roofing, insulation, and flooring. However, asbestos got banned for use in buildings due to the health risks. When left undisturbed, asbestos is harmless. But, if the material gets damaged, it can produce fibers in the form of fine dust. What Makes Asbestos Dangerous? The danger in asbestos comes from the microscopic-thin fibers. Since they are tiny, they can remain suspended in the air for days after the initial disturbance. When you breathe them in, they attach to your lung tissues, causing scarring, inflammation, and serious illnesses. Asbestos exposure can increase the risk of getting: Mesothelioma; cancer of the lining of the stomach and lung cavity Lung cancer Asbestosis, which is permanent scarring of the lung tissue Cancer of the throat, kidney, and gastrintestinal tract Scarring of the lung lining and accumulation of fluid around the lungs Which Products Have Asbestos? Asbestos became popular during World War II. Some building materials with asbestos are such as: Asbestos roofing, siding, and cement shingles Floors and walls near woodburning stoves may have asbestos millboard, paper, or cement sheets for protection Blown-in attic insulation Furnace, duct, and pipe insulation Basement boilers and pipes Joint and patching compounds Floor tiles and adhesives Artificial embers and ashes in gas-powered fireplaces Fireproof products and fire-resistant materials suc h as gloves, curtains, blankets, table pads, and old stovetops Gardening products and attic insulation with vermiculite Gaskets, brake pads and linings, and clutch facings in vehicles Some adhesives, coatings, textured paints, and plastics Is Asbestos Use in Building Materials Legal? The United States passed regulations that limited asbestos use in the late ’70s. These regulations ensure: There’s no use of asbestos in places where it could mix with air, such as gas fireplaces If there’s the use of asbestos materials, regular inspections should ensure the material remains undamaged and intact There are guidelines to ensure asbestos particles don’t escape into the air during use When Does Asbestos Become Dangerous? All types or forms of asbestos fibers can be dangerous. There’s no quick way to identify asbestos in the air you’re breathing. You can’t tell if it’s harming your lungs as it doesn’t make you sneeze, cough, or irritate your throat and skin. Asbestos fibers often mix with air when you disturb, damage, or unsafely remove asbestos materials. The fibers are tiny, so it’s impossible to taste, see or feel them. There’s a professional way to measure asbestos fibers suspended in the air. The measurements are in fibers per cubic centimeter of air (f/cc) units. According to health professionals, clean air should have an asbestos level of 0.01 f/cc. If exposed to asbestos, the harmful effects will depend on several factors, including: The intensity or how much asbestos is present The duration of exposure The intake method, whether it was through eating, drinking, or breathing the fibers Genetic mutations that make some people more likely to develop diseases Individual risk factors such as pre-existing lung diseases and smoking The material in use, asbestos, is more harmful when released into the air, like during sawing, than when bonded within a product like tiles It can also depend on personal characteristics such as your age, gender, and health status. How Much Asbestos Is Harmful? Any amount of asbestos is unsafe. All materials that have more than 1% of asbestos minerals have asbestos. High concentrations are more likely to cause asbestos-related diseases. It’s possible to get mesothelioma even from the dust that remains on clothes if someone around you works using asbestos. How Long Does It Take to Develop Asbestos-related Diseases? Asbestos diseases usually progress after a latency period. This refers to the duration between when the asbestos enters your lungs to when you start experiencing symptoms. The latency period can be anywhere between ten and forty years. Although not every exposed person develops an asbestos disease, the risk is very high. All asbestos-related illnesses become complicated, if not impossible, to cure. It’s therefore essential to prevent asbestos fibers from entering your lungs. Symptoms of Asbestos-related Diseases Since asbestos-related diseases have a latency period, you may not have any immediate symptoms. Some warning signs and symptoms can be: Shortness of breath Extreme fatigue, especially with other symptoms like unexplained weight loss and coughing Wheezing, persistent dry cough, or changing cough patterns Bloodstains in the sputum Sudden weight loss and loss of appetite Swelling in the face or neck If you notice one or multiple of these symptoms, it’s best to seek medical assistance right away. Since other medical conditions can have similar symptoms, medical tests will help you eliminate other possibilities. When caught in the early stages, asbestos-related illnesses can be treatable. Are All Asbestos Products Dangerous? Asbestos fibers are harmless unless they mix with air. Currently, building materials and products with asbestos bond it within the product. When used appropriately and in good condition, such products have minimal health risks. However, building demolition, damaging, sanding, or tearing the material can release the microscopic fibers. What if the Asbestos Material Has Damages? If you notice any damages to the material, get in touch with a professional company to sample and test the material. If asbestos is present, you’ll need to repair or remove the fabric to prevent releasing the fibers. Avoid handling the material yourself, but hire an asbestos professional to repair or remove it. Mishandling the material is riskier than leaving it as you found it. What Should I Do if I Notice Asbestos Material in My Home? It isn’t easy to ascertain that your home has asbestos. However, home constructions between the 1940s and 1970s are more likely to have materials with asbestos. If you notice asbestos materials in your home, the best move is to leave them as-is. Regardless of the amount and location, allow professionals such
Things to Know About Insurance Adjusters

Filing an insurance claim can be a stressful process, but it’s easier and faster with the help of a good insurance adjuster. They help evaluate the extent of damage after a significant incident such as flooding, windstorm, or fire. Let’s explore who insurance adjusters are and how they handle insurance claims. Who Is an Insurance Adjuster? Insurance adjusters or claims adjusters evaluate insurance claims to formulate a fair settlement amount. They handle all types of claims, such as water damage and personal injury. Once you file an insurance claim, the insurance provider hands it over to an internal insurance adjuster to estimate the repair costs. The insurance adjuster collects and documents the necessary information to help them decide on the insurance company’s financial liability. What Does an Insurance Claims Adjuster Do? The insurance adjuster plans a home visit and takes photos of the damage. They assess the extent of the damage and interview you and any other witnesses. The insurance adjuster also consults with other professionals such as roofing experts, architects, and engineers to determine appropriate estimates. Once the investigation completes, they write a report and recommend the insurance company’s amount to cover the losses and damages. They perform other tasks including: Determining the cause of the loss to see if your insurance covers it Negotiating with both sides to come up with a reasonable settlement Researching, assessing, and verifying damage to the house structure and the contents, plus other additional expenses you incur Evaluating losses caused by business interruptions Types of Insurance Adjusters There are three main types of insurance adjusters: 1.Company or Staff Insurance Adjusters Company adjusters are under the insurance company’s employment. Since they are full-time employees, they are mainly on the insurance company’s side and work for their best interest. Their primary focus is to settle the insurance claim quickly and lower the payout as much as possible. 2. Public Insurance Adjusters Public insurance adjusters have a license from the state’s insurance division to represent policyholders. The adjuster works for you and receives payment in the form of a percentage of the final settlement amount. They represent you during negotiations with the insurance company and make decisions on your behalf. However, it’s essential to note that the insurance company has no obligation to agree or accept the public adjuster’s estimate of the damages. They settle the insurance claim depending on your policy’s terms and conditions. Before hiring a public adjuster, it’s best to ensure they have a valid license and a good reputation with your state’s insurance division. 3. Independent Insurance Adjusters Independent insurance adjusters work for insurance companies rather than individuals. They are either part of an independent adjusting bureau or work as independent contractors. Although they have no obligation to the insurance company, they only have permission to work for the company, not the homeowner. How to Make an Insurance Claim An insurance adjuster is essential, but there are additional steps you should take to get the best deal possible. Step 1: Submit Your Claim After an emergency, disaster, or accident, it’s essential to get in touch with your insurance provider as soon as possible to begin the claim process. First, ensure you document the exact condition of the house and items covered by the insurance policy. Your safety is crucial so avoid entering the house if there’s structural damage that can cause the building to collapse. Record your name, home address, policy number, and the specific date and time of the incident If your home is in an inhabitable state, let the insurance agent know where and how to reach you Write a follow-up letter elaborating on the current state and retain a copy of the letter Step 2: Prepare for the on-site visit Before the insurance provider sends a representative to your home, ensure you have the proper documents at hand. Write a comprehensive list of the lost or damaged items Document the damages on video or photos before you start any repairs Retain all the damaged items until the adjuster assesses and approves disposal Document the value of lost items using sales receipts, insurance evaluations, or charge account records. If you don’t have the exact records, approximate the value and indicate the date and place of purchase List all the repair and cleaning bills, including the cost of renting equipment and specific materials Include any extra living expenses during the repair period, such as accommodation or motel bills rental car bills, and restaurant bills Step 3: The Insurance Adjuster Evaluates the Damage. Once the insurance adjuster arrives, they document the state of your house before and after the damage. Ensure you’re present or have a trusted advisor during the visit. Cooperate fully with the adjustor, as their purpose is to assist you with your claim. They’ll go through your list of lost or damaged items and consult you during the calculations. Once they finish, they will come up with an estimate for the losses and repair costs. You and the adjuster should agree on the extent of the damage. This agreement details what requires repair or replacement without a dollar value. Ensure you’re clear on what requires follow-up and why. If there are unclear instructions, clarify with the adjustor and ask for the same in writing. Step 4: The Insurance Company Offers You Reimbursement The insurance company reviews the evidence and the adjustor’s notes then give you a reimbursement amount. The length of the process varies depending on your insurance provider and specific circumstances. Although you can settle structural and property claims separately, sometimes it’s best to handle them together. However, separating them can give you enough time to examine the full extent of the losses. Avoid rushing to settle your claim, and don’t file until you discover all the damages. If the settlement offer feels unfair, you can discuss it with the adjuster and insurance agent. If you don’t agree to a settlement, you can contact your state’s insurance division and request mediation. A neutral third party will help
Help Get Insurance to Pay for Water Damage
Water damage can be one of the most costly types of damage to repair and replace. Rain, floods, and leaks are unavoidable. When an insurance company receives a water damage claim, they will decide whether or not to pay for the claims based on several factors. If the worst happens, you will have to file for an insurance claim to restore the damage caused by water. Doing regular home maintenance and ensuring that your water system runs smoothly will increase your chances of a payout. The steps of getting the entire insurance claim for water damage in New York City’s apartments include: Step 1 Determine the cause of your water damage and check your homeowner’s insurance policy to see if the insurance company covers the water damage. Insurance Covered Damages You can expect your home insurance to cover sudden or accidental water damage, but not damage caused by neglect or lack of home maintenance. Water damages covered by home insurance include those caused by natural disasters like earthquakes, storms, and hurricanes. You can also claim your homeowner’s policy if there are sudden damages like cracked pipes, a burst in the main water supply, or broken water appliances. Remember, your insurance company might only cover the damage caused by the breaks and not the actual appliances or pipes. Uncovered Damages Individual policies vary on the types of water damages not covered in them. However, the general damages in this category include gradual damage, floods, mold, and damage caused by neglect. In most cases, homeowners need to purchase separate flood insurance because of the extensive damage caused by floods. You can prevent gradual damage and damages caused by neglect. Both damages occur over a long time, giving you time to stop their effect. For example, you can inspect your plumbing system regularly and ensure that it is well-maintained. Sometimes, your water damage might not be a gradual or neglect problem but a mold problem. There are several mold warning signs that you can look out for, including: • You can watch out for mold odor. Most molds produce a persistent musty smell that is not easy to miss • There can also be visible signs of mold growth in your home. Molds come in all colors, so any change you see on your walls or damp places is a warning sign. Ensure you fix all your water leaks to avoid breeding grounds for molds • If you observe water stains or discoloration on your walls, floor, or ceilings, the chances are there is a mold in your home. You should also look out for bubbling, cracking, or peeling paint and wallpapers • Molds may also grow in the aftermath of a flood • Report the claim if the policy covers the damage Step 2 Hire a restoration service to clean up the water and moisture professionally. Determine if you need to leave your home. If the damage is severe, leave your home and allow the restoration to continue. Water damages present the risk of electrocution and unhealthy living conditions inside your home. Step 3 Take photos of the damage and things that you need to replace. Your home restoration team might take these pictures, but it is necessary to have your images. Step 4 Meet with your insurance adjuster, who will evaluate the water damage. The adjuster’s work is to determine the cause of the damage and repair cost. Step 5 Find a contractor to repair the damage once your insurance company processes your claim. In some cases, the company may have its preferred contractors. What can New York Total Damage Restoration (NYTDR) do for you? NYTDR is a restoration company that works directly with your insurance company to repair water damage on your property. It does not matter if the damage is in your kitchen, bathroom, or the whole house. The company will help you get the insurance claim and plan and design your restoration. Licensed repair restoration experts, designers, and construction specialists will remediate and restore your property from start to finish. All you need to do is initiate a free consultation!