Top Reasons Behind Leaks in NYC Apartments

Water leaks are a common nuisance in New York City apartment buildings, often leading to significant structural damage if not addressed promptly. Here’s a look at the most frequent causes of these leaks and how residents and building managers can stay vigilant. 1. Aging Plumbing Systems In many NYC apartment buildings, especially older ones, pipes wear out over time. Rust, corrosion, and mineral buildup can lead to cracks and leaks. Routine inspections and timely upgrades are essential to prevent issues stemming from outdated plumbing. 2. Poor Weatherproofing Extreme weather events and fluctuating temperatures place considerable strain on building exteriors. When weatherproofing fails, moisture can seep into walls, ceilings, and foundations, eventually causing water damage inside the apartments. 3. Faulty Roofing Old, damaged, or poorly maintained roofs are a frequent cause of leaks. Heavy rain, snow, and seasonal changes can exacerbate any weak points in the roofing, allowing water to find its way into apartments, especially on upper floors. 4. Leaking Windows and Doors Windows and doors that aren’t sealed correctly can let rainwater into apartments. Poorly installed or worn-out seals, frames, and weatherstripping are common culprits, especially during intense weather conditions. 5. HVAC System Malfunctions Heating, ventilation, and air conditioning systems are often overlooked as sources of leaks. Blocked drains, clogged filters, or faulty condensate pumps can lead to water buildup and, ultimately, leaks in walls or ceilings. 6. Overflowing Drains and Blocked Gutters Gutters and drainage systems are meant to direct water away from the building. When they become clogged or misdirected, water may overflow and seep into apartment walls, causing leaks that go unnoticed until the damage is extensive. 7. Tenant-Related Issues Sometimes, leaks arise from tenant actions, such as overflowing bathtubs or sinks, improper installation of appliances, or accidental damage to pipes during renovations. Communication and proactive maintenance are key to preventing tenant-related leaks from escalating. Preventative Tips for Leak-Free Apartments Leak prevention in NYC apartment buildings is a collaborative effort between tenants, property managers, and building maintenance teams. Regular inspections, prompt repairs, and clear communication can help minimize the risk and impact of leaks. Addressing Water DamageWe addressed all the top reasons behind leaks in NYC Apartments, If you suspect a leak or have experienced water damage, it’s essential to act quickly. Contact NYTDR, which specializes in water damage restoration and helps NYC apartment buildings recover and prevent future issues.
Water Damage Restoration Checklist: What We Need to Know
At first, when we talk about water damage restoration, we should consider that water damage can happen unexpectedly due to a burst pipe, heavy rain, or a malfunctioning appliance. Acting quickly can help minimize damage and get your home back to normal as soon as possible. Follow this comprehensive checklist to ensure you handle the situation efficiently and effectively. 1. Ensure Safety First Your first priority should be your own safety and that of your family. If the damage is severe or involves contaminated water, consider evacuating the property until it is safe. Be cautious of electrical hazards; if there is significant water accumulation, shut off the power in affected areas to prevent electric shock. 2. Stop the Water Source If possible, locate the main water shut-off valve and turn it off to stop water flow. Controlling the source of water will help limit the extent of the damage. 3. Document the Damage Before any cleanup or repairs, take photos and videos of the water damage. Document everything—walls, floors, furniture, and personal belongings. This evidence will be essential when filing your insurance claim. 4. Contact a Professional Water Damage Restoration Service After documenting the damage, reach out to your homeowners’ insurance company to begin the claims process. Insurance policies often cover water damage, but navigating the paperwork can be complicated. This is where NYTDR steps in, offering expert guidance through insurance claims while handling the restoration process. Our team will provide a comprehensive assessment, handle all communications with your insurer, and manage the entire restoration process from start to finish. Acting quickly by involving both your insurer and NYTDR ensures the process is streamlined and stress-free, with professionals managing the restoration and insurance paperwork. 5. Remove Standing Water Standing water can quickly lead to further damage and mold growth. Use a wet/dry vacuum, mop, or towels to start removing water. In large-scale flooding situations, NYTDR professionals will handle water extraction using industrial-grade pumps and vacuums to remove water quickly and efficiently. 6. Begin Drying the Area Once standing water is removed, it’s time to dry out. Open windows, use fans, and run dehumidifiers to reduce moisture. NYTDR’s drying equipment can help accelerate this process, ensuring that all areas—including behind walls and under floors—are properly dried. 7. Inspect for Mold Mold can begin to grow within 24 to 48 hours after water damage. Thoroughly inspect affected areas, especially hidden spots like behind walls or under carpets. If you detect any mold, immediately notify NYTDR, as professional remediation is necessary to ensure your home remains safe. 8. Remove Damaged Items Assess the damage to personal belongings, such as furniture, electronics, and textiles. Move any damaged items to a dry, ventilated area for evaluation. Items that can’t be saved may need to be discarded, while others might be salvageable through proper cleaning and drying. 9. Begin Restoration and Repairs Once your home is dry and safe, it’s time to begin the restoration process. NYTDR will assist in repairing walls, replacing flooring, and addressing any structural damage. It’s essential to hire a licensed contractor or restoration professional to ensure the repairs are completed correctly and meet safety standards. 10. Prevent Future Water Damage After restoring your home from water damage, take steps to prevent future water damage: Why You Should Choose NYTDR for Your Water Damage Restoration Water damage restoration is a complex process, and handling it without professional help can lead to further damage or missed issues like mold. With experience in handling all levels of water damage, from minor leaks to major floods, NYTDR takes the burden off homeowners by managing every step of the restoration process. Final Thoughts Water damage is stressful, but with the right steps, you can minimize its impact and restore your home to its original state. Following this checklist ensures you’re taking the proper actions to protect your property and your family. If you’re facing water damage, don’t wait! Contact NYTDR immediately for expert assistance. Our team will handle everything—from water extraction to complete restoration—giving you peace of mind during a challenging time.
Keeping Cool and Staying Dry: Tips to Prevent HVAC Leaks in NYC Apartments

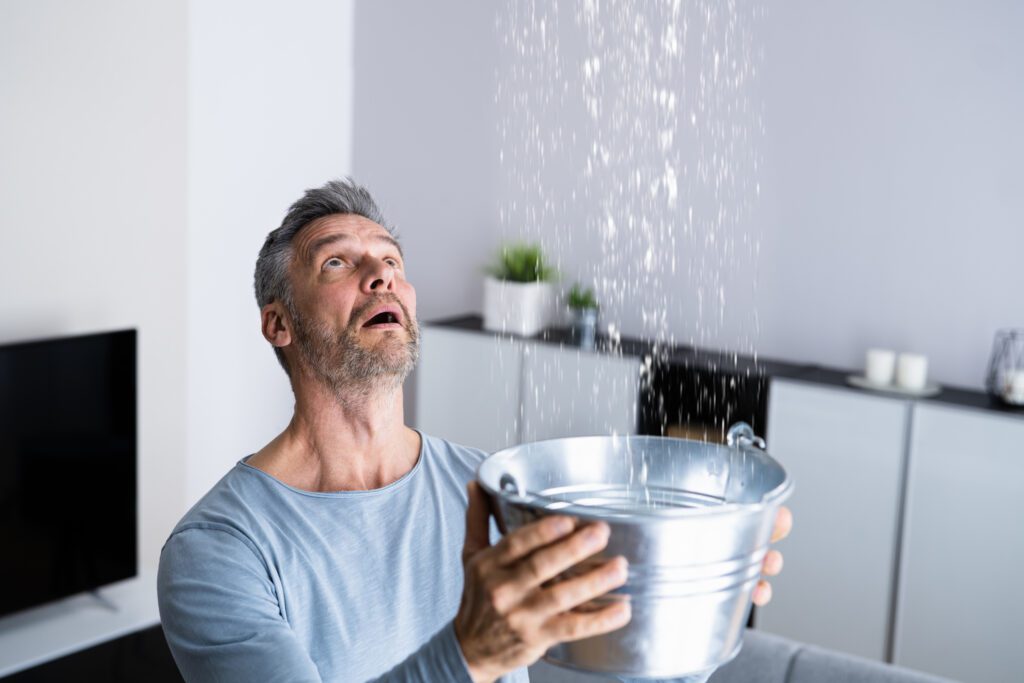
As the summer heat intensifies, keeping your NYC apartment cool becomes a top priority. However, it’s equally important to ensure that your HVAC system is running smoothly to avoid any unwanted water leaks. HVAC leaks can cause significant damage, leading to water seeping into downstairs neighbors’ apartments and potentially buckling your beautiful wood floors. At NYTDR, we’re here to help you stay cool and dry this summer with some essential tips. Understanding the Risks of HVAC Leaks HVAC systems work by removing heat and humidity from your home. In doing so, they produce condensation, which is typically drained away through a series of pipes. If these pipes become clogged or damaged, water can leak into your apartment. Here are some common issues that can lead to HVAC leaks: Clogged Condensate Drain Line: The most common cause of HVAC leaks is a clogged condensate drain line. This can be due to dirt, mold, or debris blocking the flow of water. Frozen Evaporator Coils: When coils freeze, they can cause excess water to overflow the drainage system once they thaw. Disconnected or Broken Drain Line: If the drain line is not properly connected or is broken, water will leak directly from the system. Preventing HVAC Leaks To prevent HVAC leaks and keep your apartment cool without the stress of potential water damage, follow these tips: 1. Regular Maintenance Schedule regular maintenance for your HVAC system. A professional technician can inspect and clean the system, ensuring all components are in good working order. Regular check-ups can identify potential issues before they become major problems. 2. Clean the Condensate Drain Line Make sure the condensate drain line is clear. You can do this by pouring a cup of bleach mixed with water down the drain line every few months. This helps to prevent black mold and algae buildup, which can cause clogs. 3. Check for Leaks Periodically check your HVAC system for any signs of leaks. Look for water around the unit and inspect the drain pan. If you notice any water, it’s a sign that something may be wrong. 4. Monitor the Evaporator Coils Keep an eye on the evaporator coils to ensure they are not freezing. If you notice ice buildup, turn off the system and let it thaw. Contact a professional to inspect and resolve the underlying issue. 5. Ensure Proper Insulation Make sure your HVAC unit and the surrounding pipes are properly insulated. This can help prevent condensation and reduce the risk of leaks. Handling HVAC Leaks If you do experience an HVAC leak, it’s important to act quickly to minimize damage: Turn Off the System: Shut off your HVAC unit to prevent further water production. Clean Up the Water: Use towels or a wet/dry vacuum to remove as much water as possible. Call a Professional: Contact an HVAC technician to inspect and repair the system. If there’s significant water damage, reach out to NYTDR for expert restoration services. Conclusion Keeping your NYC apartment cool during the hot summer months doesn’t have to come with the risk of HVAC leaks. By taking proactive steps and staying vigilant, you can enjoy a comfortable home without the worry of water damage. Remember, regular maintenance and quick action are key to preventing and addressing HVAC leaks. If you need assistance, NYTDR is always here to help with your restoration needs. Stay cool, stay dry, and enjoy your summer!
Common Home Damage Scenarios
Home damage can strike unexpectedly, leaving homeowners grappling with the aftermath. At New York Total Damage Restoration (NYTDR), we believe that being informed is the first step to preparedness. In this blog post, we’ll shed light on common home damage scenarios, exploring the nuanced restoration processes and insurance claim considerations associated with each. 1. Water Woes: Water leaks and flooding are among the most prevalent home damage issues. Whether it’s a burst pipe, a faulty appliance, or severe weather-related flooding, the impact can be extensive. We’ll delve into the immediate steps homeowners should take, the importance of swift water extraction, and how comprehensive drying techniques are crucial to prevent long-term structural damage. 2. Ravages of Fire: Fire damage can be devastating, leaving homes in disarray. From assessing the extent of the damage to addressing smoke residue and structural concerns, NYTDR will guide homeowners through the complexities of fire damage restoration. We’ll also discuss the emotional toll of such incidents and the importance of a compassionate and professional restoration approach. 3. Nature’s Fury – Natural Disasters: New York City is not immune to the forces of nature. Whether it’s a hurricane, earthquake, or severe storms, natural disasters can wreak havoc on homes. Explore how NYTDR is equipped to handle the aftermath of such events, emphasizing the urgency of a rapid response and the comprehensive restoration measures needed to bring homes back to their pre-disaster state. 4. Mold Menace: Often a consequence of water damage, mold poses its own set of challenges. We’ll delve into the health risks associated with mold, the importance of thorough mold remediation, and how NYTDR employs advanced techniques to eradicate mold and prevent its recurrence. 5. Storm Surge and Wind Damage: Severe weather events can lead to storm surges and wind damage, particularly in coastal areas. Explore how NYTDR assesses structural damage, addresses water ingress issues, and undertakes necessary repairs to restore homes battered by the elements. 6. Insurance Claims Navigation: Each type of home damage scenario requires a tailored approach to insurance claims. Our blog will provide insights into the documentation needed for different scenarios, communication tips with insurance providers, and how NYTDR collaborates with homeowners to ensure a smooth and transparent claims process. At NYTDR, as experienced water damage company in NYC, we understand that no two home damage scenarios are alike. By providing homeowners with knowledge about the intricacies of restoration following water leaks, fire damage, natural disasters, and more, we aim to empower them to make informed decisions in times of crisis. Stay tuned for our upcoming posts as we continue to unravel the complexities of home restoration, offering a beacon of guidance for homeowners in their time of need.
7 Steps to Tackle Leaks in Your NYC Apartment

Living in the heart of the Big Apple is exhilarating, but when leaks make an unexpected appearance in your bathroom or kitchen, it can feel like a soggy curveball. Fear not! New York Total Damage Restoration (NYTDR) is here with a roadmap to help you navigate the watery wilderness. Let’s dive into 7 steps to conquer leaks and reclaim the sanctity of your NYC apartment. Locate and Tame the Leak: The first order of business is to play detective. Identify the source of the leak – it could be a sneaky pipe, a leaking HVAC system, a rebellious faucet, or an elusive culprit. Once found, take immediate action to contain the leak. Turn off the water supply if necessary to prevent further trouble. Document the Drama: Before the restoration heroes arrive, document the damage. Snap some photos or a quick video. This visual record will not only help us tailor our restoration plan but can also serve as valuable evidence when dealing with insurance later on. Power Down the Electricity: Safety first! Water and electricity don’t play well together. As a precautionary measure, turn off the electricity in the affected area to steer clear of any potential hazards. It’s a small step that goes a long way in keeping you, your home, and our team safe. Clear the Stage: Now that the leak is contained, clear the stage for our restoration maestros. Move belongings and furniture away from the affected area. This not only safeguards your valuables but also gives our team the space they need to work their restoration magic. NYTDR Takes the Spotlight: Time to let the pros do their thing! NYTDR’s seasoned experts will swoop in, assess the damage, coordinate with your insurance, and craft a personalized restoration plan. From water extraction to structural repairs and nipping mold in the bud – we’ve got the playbook. Stay in the Know: Waiting for your haven to be restored can be a nail-biter. Fear not! NYTDR believes in keeping you in the loop. Expect regular updates on the progress – we’re all about transparency and ensuring you have the peace of mind you deserve. Remember, leaks might be the uninvited guests in your NYC apartment, but with NYTDR on speed dial, they won’t overstay their welcome. From detection to restoration, consider us your one-stop shop for turning leaks into tales of triumph. Ready to conquer that drip? NYTDR is just a call away, because in the city that never sleeps, neither do leaks!
How to Repair and Prevent Bathroom Water Damage
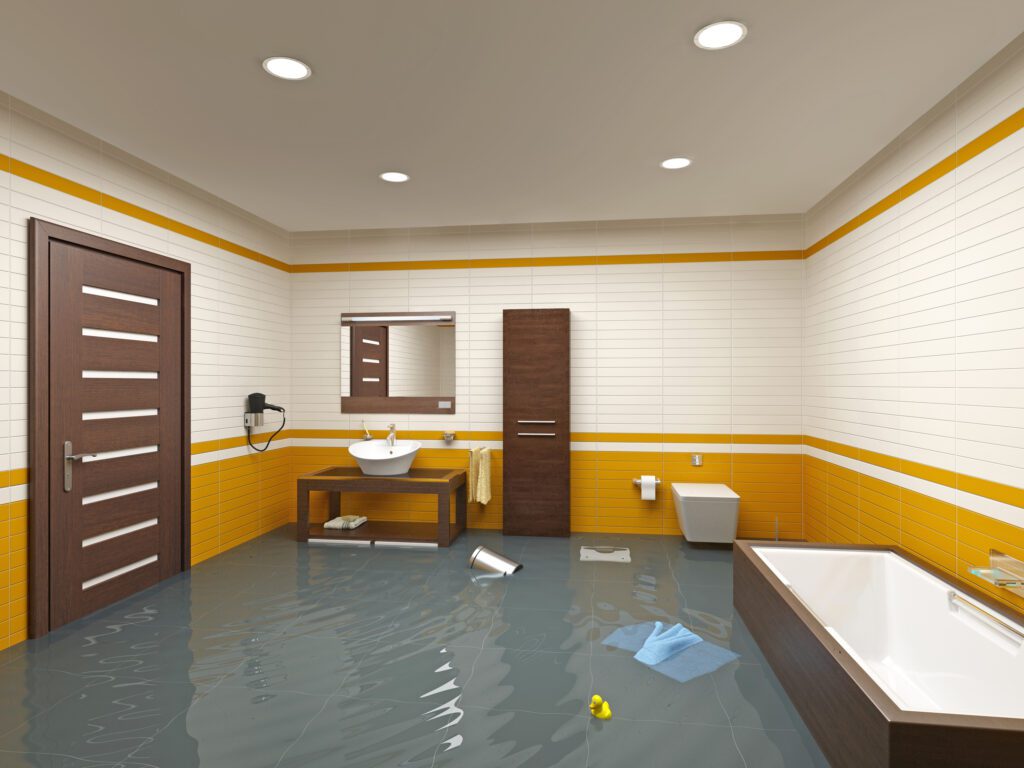
There’s no doubt that water is the key to life, but this theory doesn’t apply to the inside of your home. The damage can quickly disrupt your life, making your home a health hazard. Water damage is unique as it builds up and worsens over time, eventually distorting frames and floors, cracking tiles and sealant, and softening ceilings and walls as mold thrives. Excess water seeps into tiny cracks and pores, so even small amounts can cause irreversible structural damage with time. Such damages are widespread in bathrooms where water and moisture are perpetually present. We often overlook the process until significant damage, like cracks and bulges, catches our attention. If you face water damage in your bathroom, this article demystifies how to repair and prevent recurring damage. Recognizing Water Damage in Your Bathroom The absence of obvious evidence of water damage doesn’t mean it’s not present. Some warning signs can hint at underlying issues since the damage lurks under floors and behind walls. If you notice one or more of these signs, there’s a high chance your bathroom has water damage: § Soft or Spongy Floor One of the earliest signs of water damage in your bathroom is a soft spongy feel when you step on the floor. Most subfloors consist of a plywood subfloor which is highly water-absorbent. The plywood absorbs water, which causes the wood to soften and swell. This damage is most common on the floor near toilets and bathtubs. § Moldy or Musty Smell A moldy or musty smell in your bathroom can indicate water damage. Inspect your bathroom to identify the source if you notice such a smell. § Stubborn Mold or Fungi If mold keeps re-growing after cleaning it, you may have some underlying water damage. § Damaged Paint, Drywall, or Tile Issues Water can move a long distance through the subfloor or walls, so the leak may be further than where the visible damage appears. Look for blisters and damaged or peeling paint on your walls. Moisture seeping behind your walls can also cause the drywall to bubble or warp and tiles to loosen. How To Repair A Water-Damaged Bathroom If you notice any signs of water damage, it’s best to address the issue quickly. Procrastinating could cause irreversible damage and make your home a health hazard for your loved ones. 1. Thorough Mold Inspection The first step when dealing with water damage in your bathroom is conducting a comprehensive mold inspection. You can identify mold in your subfloor or drywall by stains on surfaces and walls and a musty smell. If you think the signs of water damage on your floor or walls are due to a more extensive mold infestation, the best move is to work with qualified water damage experts like NYTDR. These experts have the proper knowledge, skills, experience, gear, and tools to conduct thorough inspections safely. They will handle the damaged items and repair the damage, leaving your bathroom in a better state than before. 2. Room Preparation Once the experts remove the mold, you can prepare materials for the repairs and renovation. You can start by shutting off the main water valve to avoid causing further damage during the repair process. If you have furniture like a vanity and portable items, it’s best to remove them from the water-damaged bathroom. Working with industry experts with experience in bathroom restoration is a great way to save on restoration costs for damaged items like your bathroom vanity. 3. Fixing the Drywall If the water damage has affected your bathroom’s structural integrity, ensure you contact certified contractors to help with the renovation. You can DIY the repair using a keyhole saw and hammer for minor damages. You can cut the affected areas in a rectangular or circular shape to simplify the patching process. You’ll need some clips to hold up the new pieces as you secure them with joint compound and tape. Once the patches dry, you can sand and paint them to match the surrounding drywall. 4. Repairing the Floor Once the drywall repairs are complete, the next step is clearing the debris to prepare the bathroom floor. Rather than removing the damaged tiles, vinyl, or flooring and exposing protruding screws, nails, and baseboards, let experienced professionals handle this next step. The team will handle the removal and replacement of any type of flooring. 5. Installing the Fixtures With your floor and walls all done, it’s time to install new fixtures like toilets, cabinetry, sinks, shower heads, and any other items you need. If you fancy new lighting or smart devices, this is your chance to build your dream bathroom. How to Prevent Water Damage in Your Bathroom Although it can be challenging to keep your bathroom dry, you can prevent further or future water damage by: § Repairing or Replacing Missing, Cracked, or Broken Tiles Water can quickly seep through damaged tiles on your walls and floors, causing water damage. Your bathroom restoration should include replacing such tiles to avoid undoing the repair work. § Regularly Inspecting the Floor for Excess Water. It’s essential to keep checking the bathroom floor to ensure all the water drains away after using the shower or bathtub. Placing a bathmat on the floor can help absorb the excess water. § Regularly Checking for Signs of Leakage It’s best to schedule regular inspections to check for signs of leaks like moldy walls or ceilings, discoloration, and paint bubbling. You can feel the walls for soft spots and walk barefoot across your floor. Remember to check areas under sinks and vanities where water could pool. § Inspecting the Grout and Sealant Sealants and grout ensure that bathroom fittings like tiles, bathtubs, and shower cubicles remain in place. Regular exposure to heat and moisture can cause wearing and cracking, which allows water to seep through. You can clean the area and remove the damaged grout if you notice extensive damage. Allow the area to dry well before installing a new layer to prevent
How to Check for Water Damage in Your Apartment
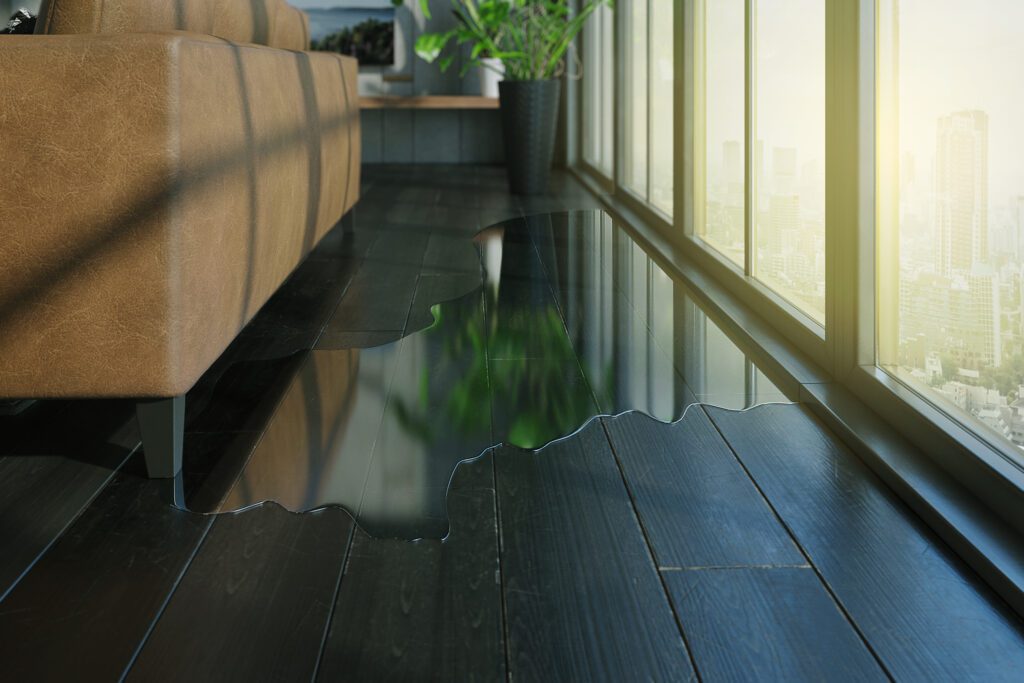
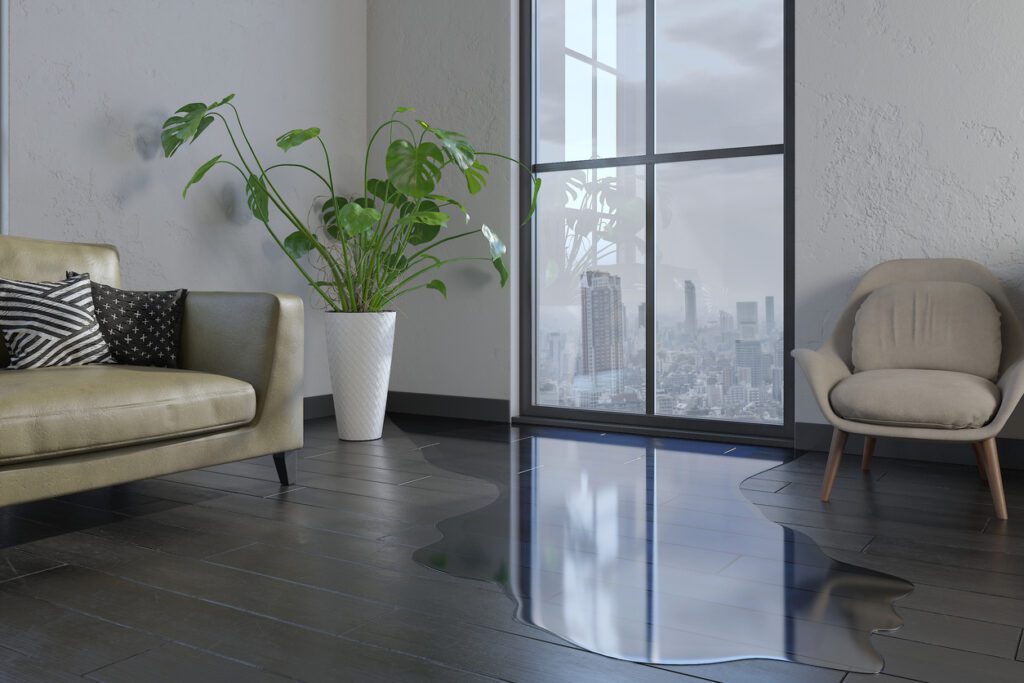
Are you wondering if there is water damage in your apartment? Water damage is a common problem that can cause major long-term issues. Knowing the signs and how to check and prevent it will help keep your home healthy and potentially save you money. Let’s explore the top causes of water damage, how to identify signs of water damage, and the steps to check water damage in your apartment- including hidden areas. Let’s get started! Common Causes of Water Damage in a Home Water damage in a home can be due to many different factors. For example, leaky pipes, leaky AC Unit, and overflowing sinks are the most common causes of water damage. Natural disasters and heavy rains can cause floods that lead to water damage. Problems such as faulty gutters or downspouts can also allow rainwater to enter your home. Such issues cause significant water damage over time. Finally, poor home maintenance can also cause severe water damage. For instance, failing to clean out gutters regularly or not checking for signs of leaking pipes can also lead to costly repairs due to water damage. It’s best to keep all these causes in mind when trying to prevent any potential long-term issues related to water damage in your home. Signs of Water Damage on Walls Water damage on walls can be hard to spot if you don’t know what you are looking for. One way to tell is by looking for discoloration or staining on the paint and wallpaper. Such signs may indicate that there has been a leak somewhere in your home. Bubbling or peeling paint strongly suggests leakage in the pipes beneath the walls. The leaking water seeps through the paint and wall, causing the bulge. You should also check for signs of mold growth, as this indicates that moisture in your walls could lead to further damage over time. If you notice any bulging or soft spots on the walls, it could also indicate water buildup behind them. For instance, you can press drywall in areas you suspect to see if it softened. If the area caves in, you likely have water damage inside the wall, even if the outside looks normal. Finally, keep an eye out for any cracking or warping due to moisture seeping from outside sources such as rainwater or flooding. These signs are severe and require immediate attention to prevent further damage. Ensure you seek professional assistance immediately from experienced remodeling contractors such as NYTDR. Such experts understand how important it is to identify potential water damage issues early. They’ll address them quickly and effectively with minimal disruption and cost. A team will visit your home for a comprehensive inspection. It includes checking for signs inside walls, floors, ceilings, and outside gutters and downspouts. They’ll check all areas where structural integrity can easily get compromised by hidden leaks over time. Compromised integrity can lead to costly repairs down the line. With expertise in local regulations, you can count on the experts to ensure your home remains safe and compliant with all applicable laws. Signs of Water Damage on Floors and Ceilings When it comes to water damage on floors and ceilings, the most common telltale sign is discoloration or staining. The discoloration could be due to a leaky pipe or a flooding issue that has gone unnoticed for some time. Another indication of water damage is the warping or buckling of the flooring. If you notice warping, it may be a sign of too much moisture in your home for an extended period that causes the wood to swell up. You also want to look for any visible mold growth, which could indicate a moisture problem. Finally, if you see any cracks in your ceiling or walls near the water pipes, this could indicate that something needs attention before further severe damage occurs. Other signs of water damage in your apartment include: § Damp Odor Some symptoms of water damage are not visual. One of the most noticeable non-visual signs is your home’s strong mildew or damp smell. Smelling mold in a room often indicates water damage within the walls. Although most older homes naturally have a slightly damp smell, it should be a subtle odor. If you notice a strong odor in any room, it’s best to have a professional conduct a thorough investigation. § Unusual Sounds Strange as it may sound, it’s possible to hear water leaks in your apartment. One of the simplest ways to check for signs of a leak is by listening. For instance, you can switch off all electronics in your home on a rainy day and stand in the room where you suspect a leak for a few minutes. When listening to the rain, it should sound like the water is sliding off the roof. Dripping water has a different sound than sliding water. Checking Water Damage in Your Home or Apartment If you live in an apartment, it’s crucial to stay aware of potential water damage. You can take several steps to check for signs of water damage and take action before the issue worsens. First, inspect any exposed pipes or fixtures for signs of leaking or dripping. If there is evidence of a leak, contact your landlord immediately so they can arrange repairs from qualified professionals. Also, inspect ceilings and walls near plumbing fixtures. Check for discoloration or staining, which could indicate a hidden leak that may not yet be visible. Finally, if you have carpets in your unit, ensure you periodically check underneath them for signs of dampness. It could indicate moisture seeping up from the floor below. Taking these simple steps will help ensure that you identify any potential problems with water damage in your apartment early on and to address them appropriately. If you’re a homeowner, you likely have a homeowners insurance policy. The home insurance policy should cover the costs of repairing the affected areas and replacing the damaged items in your home. Most renters also have a
Leaking Appliances and Why it is important to fix
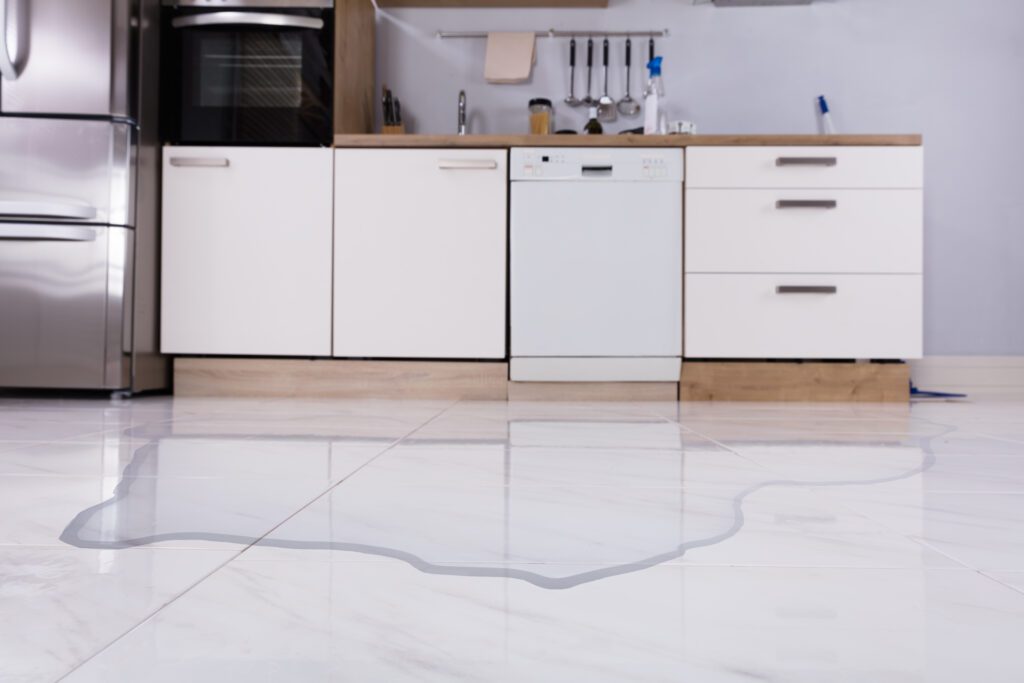
Most homeowners think of water damage as flooding during a storm or a burst water pipe in your home. But did you know that household appliances also carry the risk of water damage? Appliances damage can come from your washing machine, dishwasher, ice maker, refrigerator, water heater, or air conditioner. How do you spot leaking appliances, and what should you do about them? This guide will help you navigate water damage and restoration from leaking appliances. How To Identify Leaking Appliances Suppose your appliances are brand new and installed correctly. In that case, all connections to water, such as feed and drain pipes, should be watertight. But if you have faulty installation or old appliances, here are a few things to check for water damage: Worn hoses Faulty pipe connections Water pooling on the floor around the appliance Dripping noises Damp or mold smell As soon as you spot these signs of leaking appliances, take the steps below to minimize appliance damage and save your home. Step 1: Turn Off the Appliances If the leaking appliance is your refrigerator, HVAC, or water heater, unplug or switch it off completely. The last thing you want is for the leaking water to reach the electrical supply. Step 2: Turn Off the Water Supply If the leaking appliance is your dishwasher or washing machine, turn off the water main to cut off the supply. This is the best way to move the device without flooding your house. Step 3: Remove the Moisture Drain the supply pipes into a bucket or sink, and clean the leaked water from the walls, floor, and appliances. Next, check the surrounding areas for water damage, such as warped floor panels, peeling paint, mold, and mildew. Step 4: Call the Experts Contact a qualified appliance servicing company to inspect your leaking appliances. You may discover that you only need to replace a few parts to stop the leaking. Check your warranty and homeowners insurance for options if you need to replace your damaged appliances completely. You may also need a professional restoration company to inspect the water damage in your walls, floors, and pipes. Only a professional damage restoration company like NYTDR will fix the damage and guarantee no more leaks for decades to come. What About Water Damaged Appliances from Flooding? Appliances springing a leak is one thing; flood damage is another. No homeowner wants to come home to the loss and devastation of a storm or hurricane. The first thing to know is that even if your home looks intact after flooding, there’s still significant risk lurking beyond your sight. For example, gas and electrical lines can shift, mold takes hold inside your appliances, structural damage to your property, and more. So how do you handle appliance damage after a flood? 1. Don’t Turn Your Appliances On Instinct tells us to turn on our appliances to see if they’re still running. But after a flood, this is extremely risky. Don’t switch the lights, flick a match or lighter, plug in your appliances, or turn on the HVAC. Instead, call your utility companies to turn off the power, water, and gas. You want to minimize the chances of fire and electrocution. Note: Your HVAC needs extra precaution because it can quickly spread mold into your home. Even if it remains intact after a flood, don’t turn it on until it’s professionally inspected and cleaned. 2. Get A Professional Appliances Damage Inspection Instinct also tells us that if the appliances dry out, they’re still functional. But unless a professional water damage expert inspects them, you can never know the true extent of the damage. Whether your appliances survive a flood depends on: Which components get submerged or exposed to water How long they were in contact with water Whether the water gets contaminated with sewage or mold Without this information, you can short-circuit your appliances or electrocute yourself. 3. Check for Mold in Your Fridge and Freezer Regarding your refrigerator and chest freezer, the insulation may get exposed to water damage during a flood. Unfortunately, insulation dries out slowly and becomes susceptible to mold. Again, only a professional appliances damage expert can determine if your fridge and freezer are safe to use. 4. How To Prevent Appliances Damage Water damage from leaking appliances is easily preventable with a few precautions: HVAC Water Damage: Add a float switch to keep your HVAC drain pan from overflowing. Insulate your ductwork properly. Check the refrigerant every few months. Clean your air filter every few months. Washing Machine Water Damage: Install a flood sensor to automatically shut off the water supply and alert you if there’s water under the washing machine. Install a drip tray under the machine to catch and drain excess water. Install a single lever or automatic shutoff valve to turn off the equipment if it leaks. Dishwasher Water Damage: Check the kick plate for dampness or dripping water while the dishwasher is on. Check the water pipes, drain hoses, valves, and seals for wear and tear when the dishwasher is off. Check the gasket around the dishwasher door for damage, dirt, or dryness. Unclog the dishwasher drain and clean the drain basket. Refrigerator Water Damage: Install a water alarm behind the fridge to sense leaks and drips. Adjust the legs or add shims to ensure your fridge sits level on the floor. Clean the drain tubes to remove dirt or clogs. Tighten any loose pipes leading to your ice maker. Replace plastic ice maker pipes with a stainless steel braided pipe. Note: As a general precaution, do a self-check home inspection twice a year and a professional home inspection every three to five years. Make a habit of inspecting your home to help you quickly identify and prevent damage. Call NYTDR When You Need Professional Water Damage Restoration The above tips can go a long way to prevent water damage from leaking appliances, but they’re not 100% foolproof. You may go away on vacation or travel for work,
How to Prepare Your Home for a Hurricane or Storm?
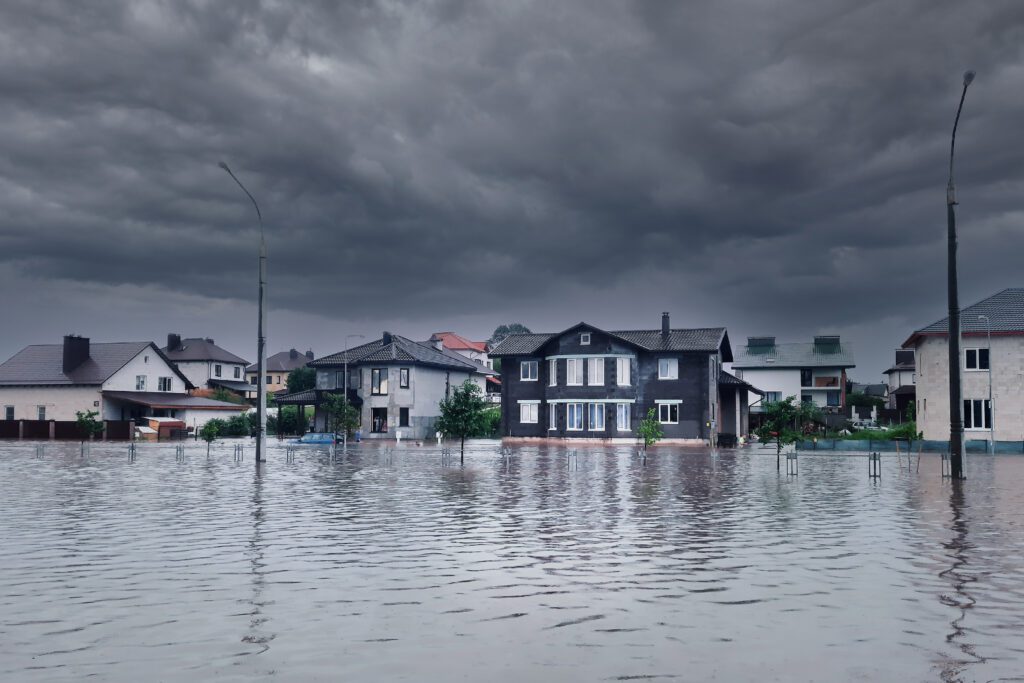
Flooding due to heavy rain, storms, and hurricanes has been more frequent and severe in the last few years. More communities in New York suffer devastating results due to global warming, high urban populations, and old drainage systems. Hurricanes often cause severe damage. While they are out of our control, it helps to prepare for such occurrences to protect your loved ones and valuable assets such as your home. Waiting until a hurricane warning or watch gets announced could give you limited time to implement some precautions. It’s easier to prevent water damage and overcome any emergency with prior preparation. So, what does preparing your home for a hurricane or storm involve? Read on for some insightful tips to help you brave the next hurricane season. Preparing Your Home for a Hurricane or Storm Hurricanes become increasingly dangerous due to the high wind speeds and intense rainfall. It’s essential to keep these two aspects in mind when preparing your home. There are various ways to ensure your home withstands the next storm or hurricane, such as: 1. Leak-Proofing Your Roof Minor leaks may not be concerning in typical weather. However, they can become catastrophic in a storm or hurricane due to the massive amounts of rainwater. Roofs often have no defense against high-velocity rain and harsh winds. Most homeowners notice some leaks or missing decking and shingles after a hurricane. The leaks can also lead to your roof sagging in some areas, which can cause the roof to collapse. Before hurricane season starts, it’s essential to have professionals conduct a roof inspection. You can use roof sealant to patch up any gaps that could leak. If your roof has shingles, have the experts inspect to ensure they are in good condition and replace any broken or missing pieces. Using hurricane straps or truss tie-downs, you can reinforce your roof against strong winds. 2. Cleaning Your Gutters The condition of your gutters is also vital in a storm or hurricane. Clogged drains may cause worse water damage than having no gutters during heavy rainfall. Gutters need to remain clean and well-maintained to function effectively. With the anticipated high amounts of water, your gutters will help direct the excess water away from your foundation. There’s always a risk of an accident when climbing on your roof. Hiring trained professionals to inspect, clean, and repair gutters is best before the next hurricane. 3. Protecting Your Doors and Windows Windows and doors have a higher risk of damage due to high-velocity winds. The wind often carries objects such as branches and patio furniture that could potentially fit through. The best way to minimize the risk of hurricane damage to windows and doors is to install storm shutters before the storm season. If you’re working with a limited budget, you can nail plywood sheets over the openings to help fortify the weak points. The plywood thickness should be about ⅝-inch (172.72 cm). If the material surrounding your doors and windows is vinyl or wood, ensure you measure the plywood to have a one-inch allowance on all sides. This allows you to drill holes into the plywood without damaging the frames. You can use a drill to drive screws into the plywood at intervals of 16 inches (40.64 cm). If you have a stucco or brick home, it’s best to position the plywood to fit the frame rather than nailing it on top. Avoid using screws and use barrel bolts instead. 4. Preparing for Power Blackouts Hurricanes cause blackouts by corroding electrical wires, flooding buildings, or knocking down power lines. You can prepare for a power outage by buying a portable generator to power your home. However, generators require precautions because they run on fuel like propane. For instance, placing it near your house can cause toxic levels of carbon dioxide inside your home. 5. Stocking Up on Supplies Hurricanes can damage infrastructure, making it challenging to reach food and drinks outside your home. § Ensure an Adequate Fresh Water Supply Floods can contaminate or cut off regular tap water. The water may be available but unsafe to use due to drainage issues. It’s best to pre-stock bottled water ahead of the hurricane season. Hurricane preparation guidelines recommend ensuring a three-day water supply for every person in your home. This is equivalent to one gallon a day for every person. The FDA proposes stocking a two-week supply for more flexibility if you have the space and resources. § Buy Non-perishable Foods Non-perishable foods are the best for hurricane or storm preparation because they don’t need refrigeration. Ensure you have various canned, tinned foods, eggs, noodles, and dry cereals. It’s also essential to consider how to cook your meals without electricity or gas. Ensure you plan for whole meals that don’t require cooking. You can also buy a portable or camping stove to cook the canned meals. They can function without electricity, but watch out for carbon dioxide poisoning when cooking indoors. 6. Having an Emergency Kit The effects of a storm or hurricane linger long after it clears. Every case is different, so estimating how long repairs will take isn’t easy. Water and electricity outages can take days, if not weeks, to address. An emergency kit helps to prepare your family for extended periods without running water and electricity. An emergency kit should have: A fire extinguisher A lighter or matches in a waterproof bag A charged cell phone and extra battery Non-perishable foods and water A radio Some cash in case banks and ATMs are offline Mosquito repellent Prescription medications Pet medication and food First aid items, like antibiotic ointments, bandages, and pain killers Flashlights and spare batteries Essential documents in a waterproof bag Extra gasoline if your generator uses gas Full gas tank in your car in case of blackouts at local gas stations Pliers or wrench to turn off utilities, like your gas line 7. Reviewing Your Insurance Policy New York is prone to flooding, so flood insurance is smart. It’s essential to go through
How to Fix Water Damaged Wood

Water damage is always a tragedy, but more so for your precious wooden floors. Even with good finishes, wooden floors can still soak up water, bend, discolor, or harbor mold. What can you do if you have floor damage from excess water? Let’s look at how to identify water damage and how to fix it. Signs of Water Damage Water damage can happen suddenly, like during a flood or slowly from leaking pipes. Some warning signs of floor damage include: Stained or discolored wood Cupping (planks curving upward on the edges) Crowning (planks curving upward around the middle) Twisting (planks bending in different directions) Lifted nails Lifted floorboards Black streaks or patches of mold As soon as you notice these signs, you may have a steady water source damaging your wooden floors. How to Fix Water Damaged Wood in 8 Steps 1. Find the Water Source What is the main cause of your floor damage? In the case of a basement flood after a storm, the damage is sudden and extensive. But if it’s due to indoor sources, discover where the excess water is coming from. Sinks, AC units, and drains are common spots for water to accumulate. However, a faulty appliance like a fridge or freezer could be shedding extra water onto your wooden floor. A burst pipe could also leak water behind your walls and accumulate in the baseboards. Check your plumbing if there are signs of water damage but no obvious source. 2. Dry the Floors Turn off the faucets, leaking appliances, or central water supply. Remove the floor carpets in case of a basement flood. Open the windows to encourage air and heat circulation. Use a towel or a wet-and-dry vacuum cleaner to soak up excess water from your wood floors. Remember that wood is a porous material, so the longer water remains on the surface, the more the water damage. Add a box fan, dehumidifier, or a heater to increase the drying speed. 3. Assess the Damage Inspect the floor damage as soon the wood is dry. You’ll clearly see the extent of the cupping, crowning, or warping on the wooden planks. A dry surface also helps you to know whether the water damage is superficial or not. Floor damage depends on: The type of water: Clean water affects wood differently than greywater, saltwater, and blackwater. External visibility: Clearly visible floor damage typically means greater damage. But in some cases, the wood surface may still look relatively intact, but the rot has already taken hold underneath it. Duration: The faster you can get rid of the excess water, the better your wood floors will be. 4. Call Insurance Once you have a good assessment of the basement flood damage or hardwood floor damage, it’s time to talk to your home insurance provider. Check if your insurance policy covers the repairs or replacements. If so, hire a water damage company for an accurate assessment and recoup the cost. If not, decide whether to DIY or call in a floor restoration expert. 5. Decide On the Best Way Forward Depending on the extent of the floor damage, you must choose between repair or replacement. Consider the type of wood, the type of finishing, and the amount of water damage. You can repair that section alone if the damage isolates to one spot, like around the kitchen sink. But if there is extensive water damage because of flooding, you may need to replace your floors completely. This is where a flooring restoration expert comes in: what looks disastrous to you may be manageable to an expert. Instead of replacement, you could sand the floor to remove the visible water damage, replace individual planks, or refinish the floor to match the original look. Note: Only an expert can handle the water damage restoration on any structural support like beams or frames. Any DIY attempt could damage your home’s integrity, leading to much greater losses. 1) Choose the Best Floor Damage Expert A floor damage expert gives you peace of mind through: A thorough water damage inspection An accurate quote or estimate for the restoration Experience working with insurance companies. A professional flooring expert will put your needs and budget at each step first. Smaller repairs should only take a few hours with no inconvenience to your schedule. A complete basement flood repair may take longer, but always negotiate the best time and cost to fix your property. 2) Prevent Further Water Damage Here are some tips to keep water damage at bay: Get into the habit of removing surface water from your wood floors as soon as you see it. Use a wet-and-dry vacuum cleaner or an absorbent cloth to soak up all spills from your wood floor. When you scrub your wood floors, use as little water as possible. Don’t pour water onto the floor: instead, sweep up the dust and dirt first, and then use a damp microfiber mop to pick up any remaining debris. Open the windows and doors, or use fans to dry the floor slowly to keep your wood floor from cracking. In case of stains, use oxalic acid to remove them and restore your wood surfaces gently, 3) Keep an Eye Out For Water Damage Water damage can sneak up on you, so it’s always best to be aware of the signs. Any changes in the shape or texture of your wood floors, or discoloration and stains, all signal water damage. Spot these symptoms early enough to save your floors in time. Those said, if you live in a hurricane or flood-prone area, clear the water from your wood floors as soon as it’s safe to do so. Fix Water Damage with NYTDR Don’t let your water damage go unattended. New York Total Damage Restoration (NYTDR) is here to help. We specialize in water damage restoration, from insurance management to expert design and contract work. Our team of fully licensed restoration experts takes the stress out of your floor restoration–let us take