Common Home Damage Scenarios

Home damage can strike unexpectedly, leaving homeowners grappling with the aftermath. At New York Total Damage Restoration (NYTDR), we believe that being informed is the first step to preparedness. In this blog post, we’ll shed light on common home damage scenarios, exploring the nuanced restoration processes and insurance claim considerations associated with each. 1. Water Woes: Water leaks and flooding are among the most prevalent home damage issues. Whether it’s a burst pipe, a faulty appliance, or severe weather-related flooding, the impact can be extensive. We’ll delve into the immediate steps homeowners should take, the importance of swift water extraction, and how comprehensive drying techniques are crucial to prevent long-term structural damage. 2. Ravages of Fire: Fire damage can be devastating, leaving homes in disarray. From assessing the extent of the damage to addressing smoke residue and structural concerns, NYTDR will guide homeowners through the complexities of fire damage restoration. We’ll also discuss the emotional toll of such incidents and the importance of a compassionate and professional restoration approach. 3. Nature’s Fury – Natural Disasters: New York City is not immune to the forces of nature. Whether it’s a hurricane, earthquake, or severe storms, natural disasters can wreak havoc on homes. Explore how NYTDR is equipped to handle the aftermath of such events, emphasizing the urgency of a rapid response and the comprehensive restoration measures needed to bring homes back to their pre-disaster state. 4. Mold Menace: Often a consequence of water damage, mold poses its own set of challenges. We’ll delve into the health risks associated with mold, the importance of thorough mold remediation, and how NYTDR employs advanced techniques to eradicate mold and prevent its recurrence. 5. Storm Surge and Wind Damage: Severe weather events can lead to storm surges and wind damage, particularly in coastal areas. Explore how NYTDR assesses structural damage, addresses water ingress issues, and undertakes necessary repairs to restore homes battered by the elements. 6. Insurance Claims Navigation: Each type of home damage scenario requires a tailored approach to insurance claims. Our blog will provide insights into the documentation needed for different scenarios, communication tips with insurance providers, and how NYTDR collaborates with homeowners to ensure a smooth and transparent claims process. At NYTDR, as experienced water damage company in NYC, we understand that no two home damage scenarios are alike. By providing homeowners with knowledge about the intricacies of restoration following water leaks, fire damage, natural disasters, and more, we aim to empower them to make informed decisions in times of crisis. Stay tuned for our upcoming posts as we continue to unravel the complexities of home restoration, offering a beacon of guidance for homeowners in their time of need.
Apartment Restoration Process

Apartments in New York City are not just living spaces; they are a reflection of your lifestyle and personality. Whether your apartment has suffered from damage or is simply in need of a makeover, the restoration process is an exciting opportunity to rejuvenate your space. At NYTDR (New York Total Damage Restoration), we’re your go-to team for the design, planning, and construction of your apartment restoration project. Let’s take a closer look at the steps involved in the apartment restoration process. Assessment and Consultation: The restoration process begins with a comprehensive assessment of your apartment. Whether your space has experienced damage due to water, fire, or structural issues, our team of experts will conduct a thorough evaluation. We will discuss your vision and requirements, including your aesthetic preferences, functional needs, and budget constraints. Design and Planning: At NYTDR, we understand the importance of design and planning in the restoration process. Our skilled designers will work closely with you to create a customized plan that aligns with your vision. We’ll take your ideas and turn them into detailed blueprints that include layouts, material choices, color schemes, and more. This phase is essential to ensure that the final result is precisely what you desire. Restoration and Construction: Once the design and planning are complete, our skilled construction team takes over. Our experienced workers will handle every aspect of the restoration, from demolition to reconstruction. We’ll use the latest construction techniques and materials to ensure a high-quality and long-lasting result. Our goal is to bring your vision to life, whether that involves repairing structural damage, enhancing functionality, or simply updating the look of your apartment. Damage Restoration: If your apartment has suffered from damage, such as water damage, fire damage, or mold growth, we have specialized teams to address these issues. We will handle damage restoration efficiently and effectively, ensuring that your apartment is not only aesthetically pleasing but also safe and healthy. Quality Control: Quality control is a top priority at NYTDR. We conduct rigorous inspections throughout the restoration process to ensure that everything is proceeding according to plan. We pay attention to the smallest details to guarantee that the final result meets our high standards and your expectations. Completion and Handover: Once the apartment restoration is complete, we’ll conduct a final walkthrough with you to ensure your satisfaction. We’ll address any remaining concerns and make sure that every detail is as you envisioned. Then, we’ll hand over your fully restored apartment to you, ready for you to enjoy and create new memories. Why Choose NYTDR: NYTDR is your all-in-one solution for apartment restoration in New York City. With our team of experienced designers, skilled workers, and specialized damage restoration teams, we can handle any project, whether it’s a full-scale renovation or damage repair. We take pride in our commitment to quality, craftsmanship, and customer satisfaction. Contact NYTDR Today: Ready to embark on your apartment restoration journey? Contact NYTDR today to get started. We look forward to working with you to transform your apartment into a space that reflects your style, needs, and aspirations. Your dream apartment is just a consultation away!
Top 10 Home Insurance Companies in NYC: Protecting Your Home and Peace of Mind

Owning a home in the bustling city of New York comes with its unique set of joys and challenges. While the skyline views and vibrant neighborhoods are unmatched, it’s essential to secure your investment and cherished belongings with a reliable home insurance policy. To help you navigate through the options available, we’ve compiled a list of the top 10 home insurance companies in NYC. 1. Chubb Chubb is renowned for its high-end and comprehensive coverage options. They cater to the needs of affluent homeowners who seek tailored policies with extensive protection. Chubb’s personalized approach and exceptional customer service make them a top choice for those requiring specialized coverage for high-value properties and valuable possessions. 2. USAA USAA has consistently received high marks for customer satisfaction and reliability. While it primarily serves military personnel and their families, if you qualify for membership, you can enjoy competitive rates and a variety of coverage options. USAA’s commitment to service and support sets them apart in the insurance industry. 3. Geico Famous for their witty commercials, Geico is also a major player in the home insurance market. While they are best known for their auto insurance, Geico offers affordable and accessible home insurance policies with customizable coverage options to protect your NYC residence. 4. Nationwide Nationwide’s reputation for dependable and flexible policies extends to their home insurance offerings. Their comprehensive coverage options, competitive rates, and excellent customer service make them a strong contender for NYC homeowners seeking reliable protection. 5. Allstate With a vast network of local agents, Allstate provides personalized service for homeowners in New York City. Their extensive range of coverage options and customizable policies allow you to tailor insurance to meet your specific needs. 6. State Farm State Farm is a household name across the United States, known for its strong financial stability and vast network of agents. They offer a variety of home insurance options, making it easy for NYC residents to find a policy that suits their requirements. 7. Amica Amica consistently ranks highly in customer satisfaction surveys. Their focus on exceptional customer service and straightforward policies makes them a popular choice for homeowners looking for a hassle-free insurance experience. 8. Travelers Travelers Insurance provides a diverse range of coverage options, making it suitable for homeowners seeking both standard and specialized coverage. Their strong financial stability and track record of prompt claim processing contribute to their popularity in the insurance market. 9. Liberty Mutual Liberty Mutual offers a variety of home insurance policies that cater to different budgets and coverage needs. Their competitive rates and various discount opportunities make them an attractive option for NYC homeowners. 10. Lemonade Lemonade is an innovative insurance provider that operates entirely online. Known for its quick and easy application process and transparent policies, Lemonade offers affordable home insurance options for tech-savvy homeowners in NYC. Before making a decision, it’s crucial to research each insurance company thoroughly, comparing coverage options, rates, and customer reviews. Remember, the best home insurance policy for you might differ based on your specific needs and budget. By investing in a reliable home insurance policy, you can gain peace of mind knowing that your beloved NYC home is protected against unexpected events.
Understanding the Insurance Claim Process: A Comprehensive Guide with NYTDR

Insurance coverage provides vital financial protection when unexpected events such as fire, water damage, or natural disasters occur. However, navigating the insurance claim process can be complex and overwhelming for policyholders. At New York Total Damage Restoration (NYTDR), we specialize in assisting homeowners with the insurance claim process and restoring their damaged homes to their previous or even better condition. In this comprehensive guide, we will walk you through the various steps involved in filing an insurance claim and working with NYTDR as your trusted contractor and advocate. Step 1: Reporting the Incident and Engaging NYTDR Promptly reporting the incident to your insurance company is crucial, and it’s equally important to contact NYTDR to begin the process of assistance. We will guide you through the initial stages of the claim process, help you gather essential information, and ensure accurate documentation of the damage. Step 2: Understanding Your Policy Understanding the details of your insurance policy is key to a smooth claims process. We will help you navigate policy language, coverage limits, deductibles, and exclusions, ensuring you understand the terms and conditions that affect your claim. Step 3: Collaborating with Your Insurance Adjuster While NYTDR is not an adjuster, we will collaborate with your insurance adjuster to assess the damage and determine the claim amount. Our team will be present during the inspection, providing insights into the extent of the damage and advocating for a fair assessment. Step 4: Documenting the Damage with NYTDR’s Expertise Comprehensive documentation is crucial for a successful claim. With our expertise, we will guide you in documenting the damage through photographs, videos, and written descriptions. Our meticulous approach ensures that no detail is overlooked, strengthening your claim. Step 5: Mitigating Further Damage and Preparing for Restoration Taking immediate steps to prevent further damage is essential. We will offer practical advice on mitigating damage and provide recommendations for temporary repairs or mitigation services. By acting swiftly, we safeguard your property and prepare for the restoration process. Step 6: Working with NYTDR – Your Trusted Restoration Contractors At NYTDR, we take pride in being your trusted restoration contractors throughout the claim process. Our team of skilled professionals is dedicated to restoring your home to its previous or improved condition. We will guide you through every aspect of the restoration journey, ensuring that your home is restored to its full glory. Step 7: Effective Communication and Advocacy Open and effective communication with both your insurance company and NYTDR is vital throughout the claims process. We will act as your advocate, facilitating communication and serving as a liaison between you and your insurance provider. Our goal is to ensure that your needs are effectively communicated and addressed. Step 8: Reviewing the Settlement Offer with NYTDR’s Guidance When your insurance company presents a settlement offer, we will guide you in evaluating it carefully. Our experienced team will provide insights and help you understand the offer, ensuring that you receive a fair and adequate settlement for your losses. We can also provide professional advice, if needed, to assist you in negotiating a better settlement. Step 9: Rebuilding and Restoration with NYTDR’s Expertise Once your claim is settled, the process of rebuilding and restoring your property begins. NYTDR’s team of experts will work diligently to restore your home to its previous or even better condition. We will oversee the reconstruction phase, coordinating with our skilled contractors to ensure a seamless restoration process. Your satisfaction and peace of mind are our top priorities. Conclusion: Navigating the insurance claim process can be overwhelming, but with NYTDR as your partner, you can have confidence and peace of mind. At NYTDR, we are committed to being your trusted partner and advocate throughout the insurance claim and restoration process. With our expertise as restoration contractors, we will guide you through each step, from reporting the incident to coordinating the restoration and ensuring a seamless experience. Our skilled team will work tirelessly to restore your home to its previous or improved condition, utilizing reputable contractors, providing accurate estimates, and overseeing the entire restoration process. We understand the complexities of insurance claims and will streamline interactions with your insurance provider, handling documentation and communication on your behalf. With NYTDR by your side, you can have peace of mind knowing that your home is in capable hands. We are dedicated to delivering outstanding results that exceed your expectations, providing regular updates and ensuring transparency throughout the restoration journey. Choose NYTDR for a seamless, stress-free, and successful insurance claim and restoration experience. Let us restore your damaged home to its full glory, allowing you to move forward with confidence and renewed comfort in your living space.
The First Steps After a Home Fire in NYC

New York City is a fantastic place to live. Unfortunately, home fires are common, mainly when high temperatures cause vegetation to dry. Based on data from Red Cross, small house fires are the most prevalent disaster. The aftermath of a home fire is often devastating, damaging the house inside and out. Even if the fire doesn’t produce wild flames, the heat can affect glass windows, causing the paint to peel and blister while melting plastic components. If your home suffered a fire, you might feel overwhelmed and wonder where to start, which is perfectly normal. This guide aims to walk you through the first steps to give you the confidence to rebuild your life. What to Do After a House Fire § Ensure Your Loved Ones Are Safe In all the confusion, it’s easy to forget basic things such as checking in with your family to ensure everyone is okay. If several people were at home when the fire started, it could be a traumatizing experience for them, especially if some were children. Take time to reach out to your loved ones, even those not in the accident. If none of your family members is close, contact close friends so you have support as you plan for fire damage restoration. If your home is a rental, let the property owner or manager know immediately before you start the recovery process. § Figure Out House Fire Insurance After ensuring everyone is okay, the next step is contacting your homeowner’s insurance provider. Doing so allows you to start documenting the event for the insurance claim process. The insurance agent can help you find emergency accommodation where your policy will cover your living expenses. You can then contact experienced fire restoration professionals from NYTDR to handle the smoke, fire, and water damage. The experts will collaborate with your insurance provider so you can focus on getting your life back together. § Determine the Extent of the Fire Damage On average, the temperature in a house fire often reaches 100 degrees at ground level and about 600 degrees at eye level. Such intense heat is enough to compromise your home’s structural integrity. The best move is to consult NYTDR’s fire damage restoration experts to help you assess the extent of the damage and determine the best course of action. The experienced professionals will remove the unsalvageable items, clean up and repair the critical areas. They’ll also manage water mitigation to reduce water damage after firefighters extinguish the fire. § Determine Whether Your Home is Safe to Re-enter It’s best to avoid entering your house after a fire until the fire department gives you the go-ahead. Fires can re-ignite even when they seem extinguished, and your roof or floor can give out due to hidden damage. Inhaling soot and smoke for extended periods can also pose a health risk. § Organize Your Possessions If it’s safe to re-enter, start by retrieving valuable items such as documents like passports and certificates. Separate the damaged items so it’s easier to list the items your insurance provider should replace. Fire restoration experts can help you sort your belongings and salvage undamaged items. They’ll also assist with professional cleaning to remove all traces of soot and smoke. § Find Temporary Accommodation to Allow Restoration In most cases, the homeowner’s insurance policy covers shelter, clothing, and food for you and your loved ones for a particular period. If you don’t have insurance coverage, you can contact local disaster relief services like the American Red Cross, friends, relatives, or church to help you find suitable accommodations as the restoration process proceeds. You Are Not Alone; NYKB is Here to Help Dealing with the aftermath of a house fire can become challenging and overwhelming for everyone involved. The smoke, heat, and fire damages are often difficult to clean and restore. You likely also have to deal with water damage caused by the water used to extinguish the fire. NYTDR fire damage restoration experts have the right tools, training, and experience to handle such repairs. You don’t have to deal with your insurance provider alone; these professionals will manage the negotiations to ensure you get what you deserve. If your home suffered a fire, you can rest assured the experts will clean, repair and restore it to its former glory. In fact, it may be in a better state, thanks to the high-quality materials and fixtures NYTDR uses.
7 Mistakes to Avoid While Buying a Home Insurance Policy

You need reliable insurance coverage to safeguard your home if you own one. A home insurance policy aims to rebuild your home and replace your possessions in case of a significant loss. Whether acquiring a policy for a new home, renewing an existing one, or making a first-time purchase, it is crucial to consider your decision seriously. However, choosing a house insurance coverage can be challenging. There are many insurance companies and policies and endless details to consider. Before it’s time to make insurance claims, many homeowners are unaware of their home insurance specifics. When purchasing home insurance coverage, avoid making these seven expensive mistakes. 1. Underinsuring Your Home According to insurance experts, one of the biggest mistakes people make is failing to buy adequate insurance that will cover the expense of rebuilding their homes in the event of destruction. With the right insurance, paying a modest monthly premium is brilliant. But if you forgo coverage for a cheaper rate, you may pay for it later. Some homeowners buy the bare minimum of insurance, just enough to meet their mortgage needs. Such a move is a costly mistake should you ever file a claim. The expense of underinsurance may be far greater than your monthly premium savings. Some policyholders also insure an amount equal to their home’s market value. However, this amount might be significantly lower than the actual cost of reconstructing your home, including labor and supplies, which could increase considerably in the aftermath of a hurricane due to high demand and limited supply. Calculate the cost of rebuilding your home to avoid making this error. Check to see whether your coverage comes close to that sum. If it’s not, step up your premiums. Remember to factor in the price you’d incur to replace the unique elements of your home, like marble floors, when evaluating the cost of rebuilding. Further, ensure you have enough insurance to cover your valuables, such as jewelry, artwork, and antiques. 2. Assuming You Have One Flat Deductible A deductible is a payout you need to make before your insurance policy starts covering claims. Some policies contain percentage deductibles for specific perils, even though your insurance may have a flat rate deductible. Depending on what you indicated when purchasing the coverage, you might think your maximum out-of-pocket expense would be $600, $1,000, or something else. Wrong. The deductible is often a percentage of your policy in cases of named perils such as storms or other significant weather occurrences, such as earthquakes and windstorms. In the event of a flood, it may amount to 1 to 5% of your insured value, whereas in an earthquake, it could amount to 10 to 15% of the coverage. Therefore, if your home has coverage for $200,000 and you suffer flood-related damages, your claim could result in a $10,000 deductible. Consult your insurance agent regarding options with one flat rate deductible before picking a home insurance policy. However, this can be more expensive and difficult to find. 3. Not Including Flood Insurance Coverage When hurricanes, tropical storms, or torrential rains strike, flood insurance protects your home and possessions from floods and storm surges. Most homeowners’ insurance policies, however, exclude flood coverage. Unfortunately, many people are unaware of this fact. You can get flood insurance from the National Flood Insurance Program. Talk to your agent about every detail of the policy so you know the coverage provided and the other policies you can purchase to maximize your protection. Adding flood insurance to your home insurance policy would be worthwhile if you reside in a flood-prone area or low-lying terrain. Even a small amount of water can result in damage costing several thousand dollars. Additionally, homeowners may erroneously believe their policy covers; Earthquake Sewage backup Mold 4. Not Understanding Your Insurance Terms [https://pixabay.com/photos/mortgage-house-contract-sign-home-5266520/] Knowing the distinction between replacement costs and actual cash value could save you money if you ever need to file an insurance claim. When you file a claim, actual cash value pays out the value of your possessions at the time of the claim. This implies that reimbursement won’t cover the expense of replacing such items or the price you paid. If you select a coverage that pays replacement costs, you will have the money to replace lost items. Additionally, insurance firms have long since abandoned “all risk” policies, which were costly for residents of states with significant exposure. Although it does not act as a warranty plan, your homeowner’s insurance safeguards you in the case of a calamity. Spend some time learning and understanding the contents of your cover. 5. Failing to Bundle Your Policies One of the mistakes you can make when purchasing home insurance is not taking advantage of bundling policies. Your insurance agent can help you buy various insurance plans in one location. These may include your motor vehicle insurance plan, coverage for your most precious possessions, and home insurance. Your insurance provider may offer substantial discounts whenever you bundle multiple plans. You can also tailor your coverage to suit your lifestyle by adding other policies to your standard house insurance policy. By bundling your plans into a single multipolicy, you may save a significant amount of money on insurance over time. You may save up to 25% on your overall costs when purchasing many policies simultaneously. Over time, you will also save a ton of time because having your insurer handle all your needs in one place eliminates the need for many phone calls, discussions, and general back-and-forth with different insurance companies. 6. Settling for The Wrong Insurance Company Home insurance aims to provide protection should you lose your house. You may end up with the coverage you don’t need if you pick an insurance provider based solely on price or proximity to you. Before making a decision, do your homework on local insurance providers, meet with your agent, and ensure you fully understand the terms of your policy. You need to be sure that the insurance company you’re dealing with is reputable and has a
How to Identify Asbestos in Your Home
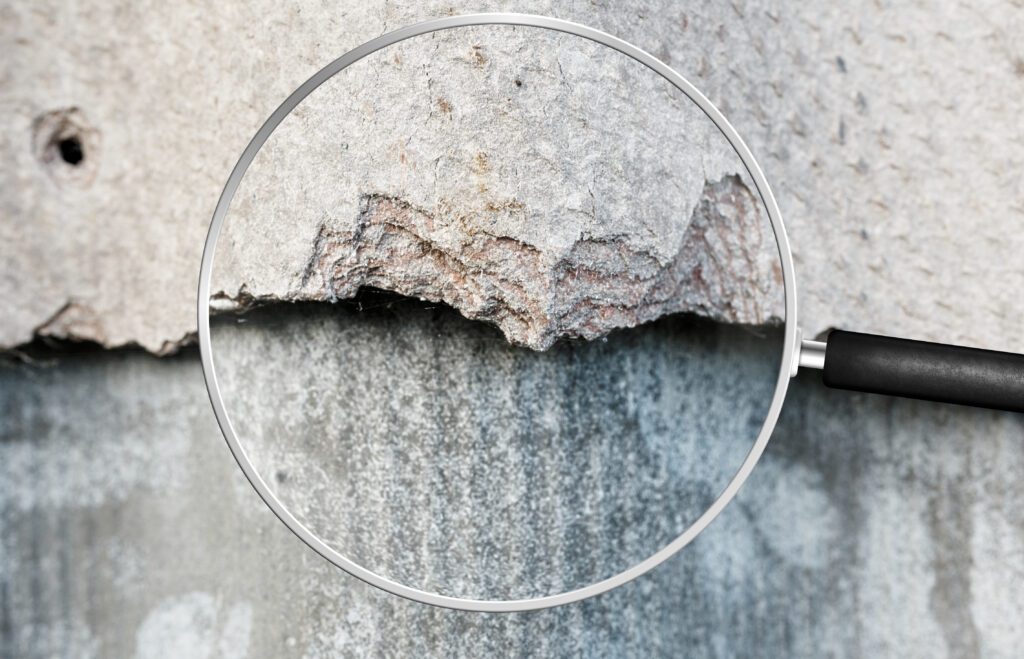
Asbestos is a mineral found naturally in certain types of rock worldwide. From the beginning of the 1940s to the 1970s, asbestos was widely used in manufacturing products, particularly building materials. This was because of its; Fire resistance Durability Reasonably low price Sadly, it was later discovered that exposure to asbestos fibers presents severe risks to respiratory health. Exposure to asbestos fibers can also lead to other health complications; asbestos Lung cancer Non-cancerous lung disease There is no cure for these illnesses, which all result in death. Places You Can Find Asbestos in Your Home? The United States outlawed spray-on asbestos and several other uses in the late 1970s, which significantly reduced the use of asbestos. However, asbestos is still present in some older houses. In such homes, asbestos may be present in various construction materials like paint, floor tiles, and insulation. Furthermore, before the 1980s, many American homes and public buildings, including schools and government housing, contained asbestos in the following materials: Some vinyl floor tiles Asbestos insulation around steam lines Cement asbestos board siding/under sheeting Asbestos roofing felt for shingles textured paintestos-containing vermiculite insulation Vinyl floor tiles Although many residential applications for asbestos are no longer allowed, it is still permitted in the US for over a handful of other applications. Signs Your Home Might Have Asbestos It is difficult to detect asbestos, which can often hide in plain view inside your house. Asbestos can appear as green, brown, or blue fluffy fibers. However, tiny fragments can also be present in materials such as cement or plastic, making them difficult to identify by yourself. Asbestos is hazardous when disturbed, so you should never dig around to look for it. While you can gather samples for testing, it is much better if an asbestos expert handles the task. Here are a few signs your house might contain asbestos: It has been around since the early 1980s Has corrugated roofing It has an older cement water tank It contains vinyl flooring or millboard included between 1952 and 1982 Has vermiculite insulation Have walls or other interior surfaces made of cement sheets Everyday Asbestos Exposure at Home The following are some of the common ways Asbestos exposure can occur at home ways: DIY home improvements, such as attic remodeling Replacing a worn-out pipeline. Drilling holes through drywall Vinyl floor tile removal Cutting Insulation on Pipes Removal of popcorn ceiling When to Carry Out Asbestos Testing for Your Home [https://pixabay.com/photos/sign-caution-asbestos-spray-paint-3789310/] In the 20th century, constructors mainly used asbestos in building materials and home insulation, and it’s easy to see why. Asbestos is durable and can resist heat, corrosion, and electricity. However, over the years, studies have found asbestos to be highly toxic, which has led to its ban. Statistics show that asbestos-related diseases causes 255,000 deaths annually. These illnesses include: Stomach tumors Asbestosis Stroke Pleural plaques Most homeowners might never need to have their houses tested for asbestos. Simply having asbestos in your house is not dangerous, as asbestos fibers are only a health hazard when inhaled. However, you should hire an expert to conduct an asbestos test if you; Intend to do construction work Observe damage to some of the drywall, siding, or piping Plan to remodel Have other concerns. How Asbestos Testing Works The length of the inspection procedure will depend on how big your house is. It may take hours or some days. The asbestos expert will do the following while inspecting your home; Turn off the heating and cooling systems to avoid the dispersal of any particles. Cover the surface beneath the test area with a solution of water and soap to minimize the discharge of fibers. Take tiny bits of potentially hazardous material. The aim is to disturb it as least as possible. Place the contaminated material into a secured container for shipping Clean the inspection area and throw away any remaining materials Gather any loose materials or fibers, not in the covered area with a wet cloth Submit the sample material to an accredited laboratory for testing. What to Do If Your Home Has Asbestos Following the discovery of asbestos in your home, your next course of action will depend on the following; The type of asbestos Its location Whether friable or not Friable asbestos could readily disintegrate, releasing hazardous airborne particles. However, some materials containing asbestos are non-friable and are still secure if they’re in excellent shape. Your contracted asbestos expert may then decide to remove the asbestos or repair the affected areas with an encapsulant or covering, depending on the state of the asbestos. You will need to leave the house until an air test shows clear of all residue should the expert find it necessary to remove the asbestos. Asbestos removal is typically more expensive than a repair, but if you first repair, asbestos removal may be more challenging and costly in the future. 1. Enscapulation (sealing) Encapsulation is the application of a sealant to the material, which either coats the asbestos material or bonds the asbestos fibers to prevent fiber release. This method is efficient for furnace, pipe, and boiler insulation. 2. Covering(enclosure) Covering entails wrapping a jacket or protective wrap around the asbestos-containing substance to prevent fiber release. Never try to remove asbestos yourself from your house, as improper asbestos handling may create additional problems. You should always engage a specialist. Asbestos removal may seem expensive, but it is worth it. The average cost of asbestos removal ranges from $1,100 to $2,800. Guidelines for A Safe Asbestos Removal Obtain written confirmation from the contractor that they complied with all applicable asbestos removal and disposal laws Ensure to engage only contractors granted state authorization to do asbestos abatement work. Request references and recently completed comparable projects. Request a disposal manifest before settling the final invoice to confirm that the contractor will dispose of the material in a landfill authorized to accept asbestos. Find out if the company has ever had safety violations. Contact the local air pollution control board, the organization in charge of worker safety, and the Better Business Bureau. Confirm the contractor
What You Should Know Before A Kitchen Restoration

When it comes to water, fire, and smoke damage, the kitchen is the most vulnerable part of the home. Leaking plumbing, faulty appliances, or even cooking accidents can damage your kitchen. But you can restore a damaged kitchen to its former glory or create an entirely new space. Before you embark on a kitchen restoration, here are some essential things you should know. Top 5 Factors to Consider Before A Kitchen Restoration 1. Budget Damage restoration typically means a significant and unexpected expense for homeowners. But before you get overwhelmed by renovation costs, figure out the following: How much you can spend – what’s in the bank How much you wish you could pay – this is a great way to get creative with your kitchen choices What you absolutely must have in your restored kitchen How much of the restoration work can you do yourself versus hiring a contractor How much you can spare for hidden costs – you may discover mold, pests, or structural issues once the renovation is underway 2. Time Frame The general rule in home renovations is that it takes twice as long as you’d expect. Know how much time you can give to your kitchen restoration, including if it drags on for an extra week or two. Next, find a contractor who can do the project in half the time. This way, you’ll be well within your schedule if the contractor needs more time. 3. Insurance Your homeowner’s insurance can help manage the kitchen restoration costs, including repairing or replacing cabinets and appliances. You can also get reimbursed for extra living costs if you have to move out of your home for the damage restoration process. However, you must prove that the damage was due to something beyond your control, not the homeowner’s negligence, then settle for much less than you deserve. It’s better to have a damage restoration company like NYTDR handle insurance claims on your behalf. 4. Storage A kitchen restoration is a chance to rethink your cabinetry in terms of style and space. Suppose you want the same cabinet material or color as before. In that case, you can elevate the design by adding extra functions like a lazy Susan or updating the pulls and handles. Also, consider maximizing wall space and corners to add extra room for your utensils and gadgets. 5. Layout Think of your kitchen with all cabinets, drawers, and appliances open. If doors bump into each other or block access to any other kitchen feature, you have a layout problem. A kitchen restoration can help you reorganize your floor plan to increase functionality, especially if your family is growing or if it’s your forever home. Speak to your contractor about future-proofing your kitchen for pregnancy and old age. What To Expect From A Kitchen Renovation It’s essential to understand the kitchen renovation process, whether you’re handing it over to a professional contractor or doing some parts yourself. Once you know what it takes, you’ll better manage your expectations and stress levels. The typical damage restoration process follows the steps below: Step 1: Demolition The damaged cabinets, floors, walls, and fixtures must go out before the new elements come into your kitchen. Don’t be tempted to DIY this step, in any case. You may interfere with the wiring and plumbing or damage your home’s structural integrity. Leave the experts to tear out your damaged kitchen and remove the debris safely. Step 2: Plumbing and Framing You’ll need to move the plumbing and frame the walls to accommodate features like a kitchen island, new sinks, or new ventilation. There’s less work involved at this stage if you opt for a replacement rather than a complete kitchen renovation. Step 3: Inspection A professional inspection ensures that everything in the walls meets building codes before adding the drywall or other finishings. A licensed kitchen restoration crew handles the assessment and gets the approvals necessary to proceed with construction. Step 4: Complete the Walls Once you pass the building inspection, the next step is to install the drywall, windows, and doors. Consider the kitchen’s insulation, so seal every crack to minimize heat loss in cold weather. Also, install the trim for the cabinets at this stage for precise fitting. Step 5: Install Cabinets, Fixtures, Countertops, And Appliances At this stage, your kitchen restoration truly comes alive. You’ll start to see your restored kitchen as it once was or watch as all the elements of your brand-new space come together. Of course, there may be some plumbing or electrical challenges here, so trust your professional contractor to solve them as they arise. Also, if you’re upgrading appliances, go for features that add value to your home, such as energy efficiency and smart devices. A Note About Flooring Depending on various factors, you can install the flooring before or after your cabinets and appliances. For example, cabinets come before installing thinner flooring like vinyl or laminate and hardwood or tile flooring. A baseboard or molding covers the gaps between the flooring and the cabinets. In contrast, cabinets come after flooring if you need to correct the floor height because of construction flaws or if you need to reach standard countertops height. Weigh the pros and cons of each flooring option as you plan your kitchen renovation. Stress-Free Professional Kitchen Restoration With NYTDR No homeowner needs the pain of property damage, but these tips can help you think things through. Save yourself the stress by choosing a professional kitchen restoration company like NYTDR to handle damage restoration from start to finish. We sort out your insurance at no extra cost and design and build your new kitchen within your schedule and budget. Our designers and contractors walk you through every step of the damage restoration process. Share your dream kitchen with us, and we’ll make it happen. Call 212.206.1300 to start your free consultation today.
How to Choose the Home Insurance That’s Right for You

For most people, a home is the most valuable asset and therefore requires adequate protection for worst-case scenarios. Homeowners insurance is vital as it prevents you from financial challenges if someone gets injured on your property and sues you or you suffer a home-related loss. Although this insurance is not a legal requirement, it’s mandatory for anyone applying for a mortgage. Either way, a homeowners insurance policy is an excellent idea to protect you and your home. This article explores homeowners insurance policies while providing guidelines to help you choose the right policy. Homeowners Insurance Policies Before choosing a homeowners insurance policy, it’s essential to understand what it covers and doesn’t. Generally, any home insurance policy includes the following standard coverage: Building code coverage – Involves the cost of rebuilding your home up to code after damage caused by a peril that is under the policy Dwelling coverage – Includes damage to the house and its structure Liability coverage – Safeguards you from medical costs and related expenses if a visitor gets injured on your property Loss of use coverage or additional living expenses insurance (ALE)- Pays back the costs incurred when your home is uninhabitable, such as meals and hotel stays. Other structure coverage – It includes other structures or buildings within your property, such as tool sheds, guest houses, and fences Homeowners insurance covers most common perils that cause damage, including: Household fires Rainwater that enters the house directly Damage due to extreme cold spells, like burst pipes The standard deductible for the insurance policy or the amount you pay annually covers these common perils. However, less common dangers require different coverage. Most insurance providers do not cover perils such as: Wildfires Damage from windstorms and hail Hurricanes exceeding a certain intensity These perils require a higher deductible, often totaling thousands of dollars. Choosing a Homeowners Insurance Policy When you acquire homeowners insurance, the insurance provider issues the policy as a monoline or package. Monoline policies have only one coverage type, such as liability insurance. On the other hand, package policies have various kinds of coverage, like liability insurance and property insurance. Generally, a monoline policy is more expensive because you need to purchase every coverage separately. § Package Policies Standard homeowner policies available in New York come as package policies. They include medical payments, theft, liability, and property coverage. These policies include basic packages and more extensive packages. Comprehensive packages cost more but offer broader coverage for your personal belongings and home. As a homeowner, it’s essential to understand the particular losses or perils that every policy type covers. You can buy an extra premium if a policy excludes particular coverage, such as power disruption. To lower your premium, you can also exclude some coverage indicated on a policy, like off-premises theft. However, tenant and homeowners policies exclude particular coverage like flood insurance. The only option to acquire this policy is via government insurance programs. Let’s compare standard policies and their coverage to help you determine the right one. 1. HO-1 or Basic Homeowners Policy This policy protects your home and personal belongings in case of the following perils: Bodily harm Smoke, lightning, and fire damage Explosion Glass breakage Malicious mischief and vandalism Aircraft and vehicle damage Theft and burglary Hail and windstorm Damage to other peoples’ property Civil commotion and riot medical payments Additional living expenses if you need temporary accommodation Personal property at home and away civil judgments This type of policy is uncommon as most providers offer more comprehensive policies like the Broad Form Policy. 2. HO-2 or Broad Form Policy This policy safeguards your home and personal belongings against the above perils and additional ones, including: Freezing of plumbing systems Falling objects Electrical damage to home appliances Damage from accidental water and steam overflow or discharge within the plumbing, air conditioning, heating, or fire sprinkler system Weight of sleet, snow, and ice 3. HO-3 or Special Form Policy The HO-3 policy is the most common among homeowners. It protects your home from all causes of physical loss, excluding the perils not covered by the policy, such as: Nuclear accident War Earthquake Flood Most financial institutions and lenders require you to purchase an HO-3 policy as part of your mortgage agreement. 4. HO-5 or Comprehensive Form Policy This policy offers protection against the perils covered by the HO-3, with additional protection for personal belongings. It protects the private property against all causes of physical loss except the excluded perils. You can also get this extra protection through a Special Form Policy that includes an endorsement for Special Personal Property. 5. Market Value Policy This policy is an advanced form of the Basic Policy. Generally, it offers replacement cost coverage, although the amount is within the necessary restoration costs. This policy applies when the property’s replacement value exceeds the market value, like with older homes. 6. HO-4 or Tenants and Cooperative Policies Tenants and cooperative policies protect against any damages to the contents of a rental unit. It also covers personal liability if someone sustains an injury or causes property damage in the insured unit. 7. HO-6 or Condominium Owners Policies Condominium policies protect the contents and property in the insured unit against the following: Alterations Improvements Fixtures Appliances Interior walls Ensure you confirm the excluded and covered perils in the policy you intend to buy. If damage to the home contents is not part of the policy, you should consider getting additional coverage. Steps to Get the Right Homeowners Insurance § Determine What Requires Coverage The first step is establishing your assets’ total value, the value of your personal belongings, and your home’s replacement cost. If your home is in a high-risk area, you should consider getting earthquake or flood insurance and coverage for additional structures such as sheds or garages. § Calculate the Coverage You Need The amount of coverage necessary depends on your home’s replacement cost. This replacement cost considers the size of your home and the local construction costs. It
Heating Your Home Safely – Fireplace Safety Tips
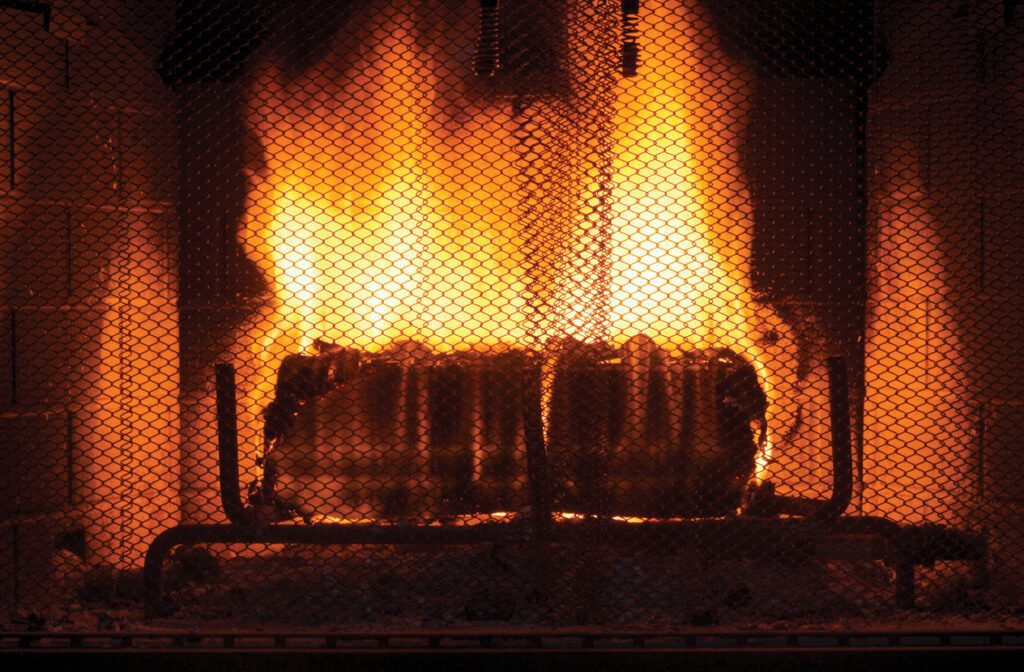
The “heat season” in New York always brings fresh challenges for landlords and tenants across the state. If you’re renting an apartment in NYC, your landlord must provide heating from the beginning of October to the end of May. This legal requirement states that: The temperature inside your apartment should be at least 68F if the temperature outside drops to below 55F The temperature inside your apartment should be at least 68F from 10 PM to 6 AM If your landlord violates this law, you may decide to withhold rent until they comply. However, informing your landlord about the issue in writing is better, or filing a complaint through the 311 hotline. Suppose your NYC apartment has a wood-burning fireplace. It can certainly boost your heating if the building’s radiators still run too cold. You can also install a ventless fireplace, but you need to follow building regulations and get approval from your landlord. Remember, though, that fireplaces lead to around 15,000 fires in the U.S. every year. If you have young children or elderly family members, you want to keep them safe from accidental burns and respiratory problems, too. Follow this guide to enjoy your fireplace and heat your home safely every year. Fireplace Basics: Top Tips to Maintain Your Fireplace Four main things make a fireplace an active hazard: Poor maintenance Overfilled fireplace Blocked chimneys Flammable objects around the fireplace While a ventless fireplace needs less maintenance than a wood-burning fireplace, you still need to take the proper precautions to avoid fire damage. Follow the tips below to use your fireplace safely. Wood-Burning Fireplace Maintenance Tips Use The Right Fuel Avoid using chemicals like gasoline or kerosene in your fireplace, or painted, moldy, or rotten wood. These could release toxic chemicals into your home. Instead, use dry kindling or newspaper to start your fire, and use locally-sourced firewood. Hardwoods typically burn longer than softwoods, but both must be completely dry to burn well. Check the Chimney If excess carbon particles accumulate in your chimney, they can lead to a fire. They can also block the vent, leading to smoke and carbon monoxide poisoning. Check your chimney cap mesh and masonry for damage, and cut any overhanging tree limbs that may potentially catch fire or otherwise damage your chimney. Get a professional chimney cleaning every year to avoid fire damage. Clean the Hearth After Use Don’t let ash build up in your fireplace because it may hide embers that could catch fire again. Scoop out the ashes once the fireplace is completely cold. Wear heatproof gloves for safety. Use a handheld vacuum cleaner to remove the fine ash particles from your fireplace. Check Your Smoke and Carbon Monoxide Detectors Regularly A clean chimney keeps carbon monoxide levels low. Still, this deadly gas is completely odorless, and you need to know if you’re at risk. Opt for a combination smoke and carbon monoxide detector to monitor both gases every time you light your fireplace. Ventless Fireplace Maintenance Tips 1. Cool Completely Before Cleaning A ventless fireplace takes about half an hour to cool down enough to handle. If the glass face is still warm, don’t attempt to open or clean the inside of the fireplace. Otherwise, you could risk fire damage and injury. 2. Pay Attention to The Log Arrangement Take a picture of your ventless fireplace before taking the logs out. They’re arranged to reduce vent blockage, soot, and carbon monoxide. Replace the logs in the correct order once you finish cleaning the fireplace. 3. Do A Visual Inspection Check the fireplace for dark stains, soot, dirt, embers, and ash. Gather the tools you’ll need, such as a vacuum cleaner or vinegar solution, to clean soot stains. 4. Use Compressed Air to Clean Ducts and Tubes A can of compressed air works wonders to remove dust, dirt, and lint from your fireplace inlets. Clean all the air ducts and tubes every three months or more frequently if: You live in a dusty environment or have fur-shedding pets The flames change color from blue to orange, yellow, or red, which may indicate soot or carbon monoxide. 5. Cleaning the Glass A ventless fireplace glass face is supposed to withstand high heat, but avoid using your regular oven cleaner, especially if it contains ammonia. Paper towels and abrasive cleaners are also unsuitable for fireplace glass. Instead, use a mild glass cleanser and cloth. To clean both sides of the glass, remove it from the fireplace and put it on a towel to avoid cracks and scratches. General Fireplace Maintenance Tips Whether your fireplace is wood-burning or ventless, here are some extra tips that enhance safety when heating your home: Never leave the fireplace unattended. If you’re leaving the house, ensure the fire is entirely out. Keep fuel at least three feet away from the fireplace. In this case, fuel means anything flammable, including paper, cardboard, plastic, cloth, tissues, matches, etc. Store your fireplace tools safely away from children’s reach. These include lighters, matches, brooms, tongs, and pokers. Add a safety screen in front of your fireplace to protect yourself and your loved ones from accidental burns. Your fire extinguisher should always be within reach. Also, keep a fire blanket at hand to suppress small fires. Fire Damage from The Fireplace? Restore Your Home Today A fireplace is a beautiful feature in any home, and the tips above should help to keep you safe and warm. Unfortunately, that cozy fireplace ambiance still poses a risk of fire damage. If a fire gets out of hand, call NYTDR as soon as possible. We specialize in restorations for New York homes and apartments after a fire, including soot and smoke damage. NYTDR handles: Insurance management: We intervene on your behalf to get the proper settlement for fire damage restoration at zero cost to you. Restoration design: Our expert home designers help you visualize your home to restore it to pre-fire damage or create a brand-new space. Construction: We handle the contracting and on-site